Working faster
In this chapter you learn the Easy Form Studio keys and how to make one change on several cabinets at once. You will see how to pass one cabinet's settings to others, what the right-click on a cabinet offers, and how My settings become the starting values of every new cabinet and project.

Before you start
- Open a project with a few cabinets, or add three cabinets with C.
- In the toolbar on the left, the EFS tool (EF icon) should be selected. The EasyFormStudio app selects it by itself.
- The 3D viewport header must show Object Mode.
- Keep the mouse pointer over the 3D viewport when you press keys.
Keys
Where the keys are
- In the sidebar on the right, open the EFS tab.
- Click the title of the Easy Form Studio panel to expand it.
- Click Keys.
A list of all EFS keys opens. It closes when you move the mouse off it.
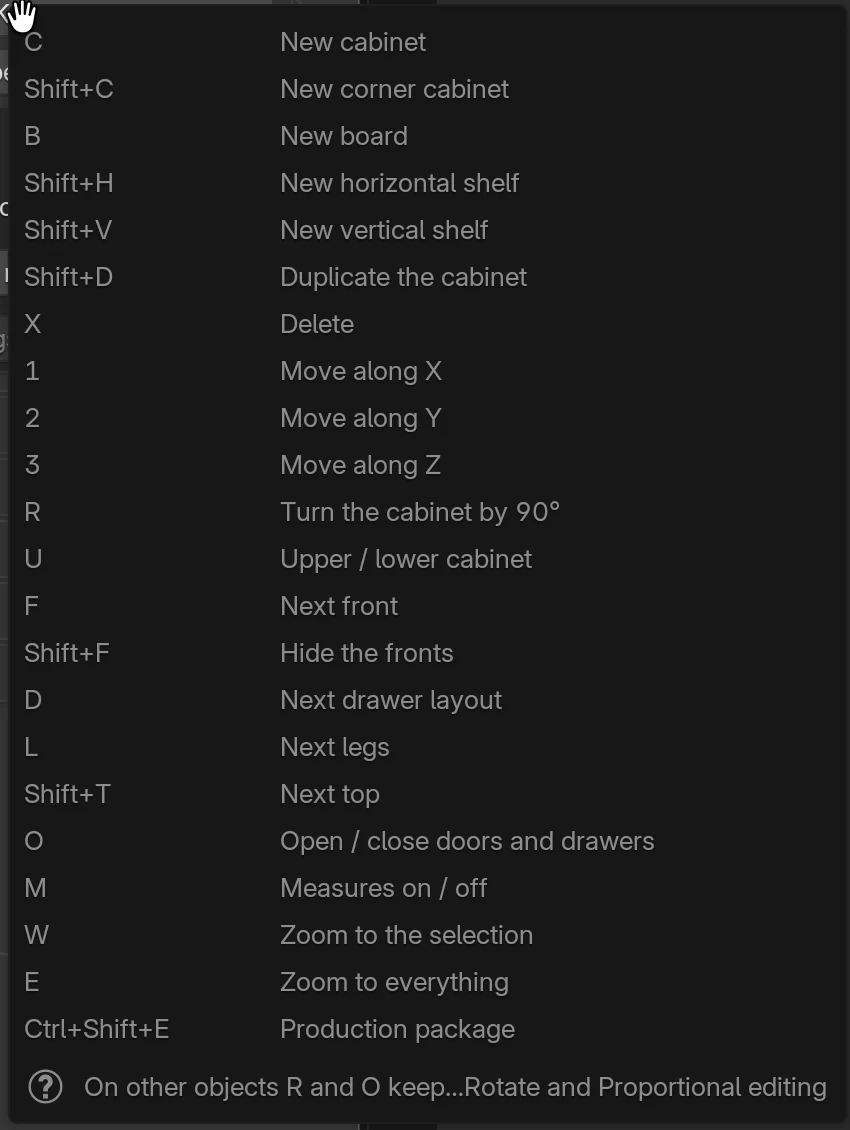
The same Keys button is also in the add-on preferences (Edit → Preferences… → Add-ons, the Easy Form Studio row), in the Keys box.
The list shows the keys as they are currently set. If EFS keys only with the EFS tool is on in the add-on preferences, the top of the list says Only while the Easy Form Studio tool is active. At the bottom of the list is a note that on objects that aren't cabinets, R and O keep Blender's rotate and proportional editing.
How the keys work
- A key acts on what is selected. If a board of a cabinet is selected (a front, a side panel, a shelf), the key acts on the whole cabinet. If nothing is selected, most keys act on the last active cabinet.
- Keys work only while the mouse pointer is over the 3D viewport. Over the sidebar or a panel, the key doesn't work.
- Keys work only in Object Mode.
- EFS keys take priority over Blender's keys on the same letter. When an EFS key has nothing to do (for example R while several cabinets are selected), Blender does its own action for that key. The section When an EFS key can't act describes these cases.
- Almost every action can be undone with Ctrl+Z.
Note
On a Mac, press Ctrl in EFS shortcuts as on Windows, with the Control key.
Adding
| Key | Action | On several cabinets | Condition |
|---|---|---|---|
| C | New cabinet. Without My settings it is 600 × 580 × 720 mm. If a cabinet is selected, the new one comes next to its right side, or next to its left side if the right is taken. It then takes the neighbour's rotation, height and depth. | No | It comes next to the selected cabinet only when the Forward alignment positioning option is selected in the header. |
| Shift+C | New corner cabinet. | No | Doesn't use My settings. |
| B | New free board, not part of any cabinet. | No | — |
| Shift+H | New horizontal shelf in the selected cabinet, at equal spacing. In a corner cabinet it adds a shelf, up to three. | No | Exactly one object is selected. Doesn't work when a shelf alone is selected. |
| Shift+V | New vertical shelf (divider) in the selected cabinet. | No | Exactly one object is selected. Doesn't work on a corner cabinet. |
Shift+A is Blender's key for the add menu. The EFS items are at the bottom of that menu, under Easy Form Studio. The Add button in the EFS tool header opens the same items.
Fronts, drawers, legs, top and wall unit
Each of these keys switches the cabinet to the next state in a cycle. When you reach the end, it starts again.
| Key | Action | Order of states | On several cabinets |
|---|---|---|---|
| F | Next front | None → Left opening → Right opening → Two doors → the same cycle with Inset on → back to overlay fronts | Yes, except corner cabinets |
| D | Next drawer layout | None → Outer drawers 1, 2, 3, 4, 5 → Inner drawers 1, 2, 3, 4, 5 → None | Yes, except corner cabinets |
| L | Next legs | None → Rounded legs → Squared legs → None | Yes, also on corner cabinets |
| Shift+T | Next top | None → Standard → Double cross boards → Front cross board → Back cross board → None | Yes, except corner cabinets |
| U | Upper / lower cabinet | A wall unit goes to the project's Upper elements height (default 1430 mm from the floor), and its fronts move to the F 2 material group. A base unit goes back to the floor, with its fronts in the F 1 group. | Yes, except corner cabinets |
Flaps (Top opening, Bottom opening) are not in the F cycle. You choose them in the cabinet panel, as How a cabinet is built describes.
Tip
When several cabinets are selected, the active cabinet (the last one selected) decides the next state, and all selected cabinets get the same. If the cabinets had different fronts before, after one F they have the same.
Moving and rotating
| Key | Action | On several cabinets | Condition |
|---|---|---|---|
| 1 | Move along X | Yes | There must be an active object. |
| 2 | Move along Y | Yes | The same. |
| 3 | Move along Z | Yes | The same. |
| R | Turn the cabinet by 90°: 0° → 90° → 180° → 270° → 0° | No | At most one object is selected, and it is a cabinet or one of its boards. |
How moving with 1, 2 and 3 works:
- Select the cabinets you are moving.
- Press the axis key. The cabinets move only along that axis.
- Move the mouse or type the distance in millimetres, for example
600. - Confirm with Enter or a click. Cancel with Esc or a right-click.
A board moves its whole cabinet. Other selected objects, such as a free board or a light, move together with the cabinets. The selection stays the same after the move.
You have the same rotation as R in the cabinet panel, under Z rotation (the 0, 90, 180 and 270 buttons).
Duplicating and deleting
| Key | Action | On several cabinets | Condition |
|---|---|---|---|
| Shift+D | Duplicate the cabinet. If a board of a cabinet is selected, the whole cabinet is duplicated, with its decors and all settings. A free board is duplicated as a board. | No | Exactly one object is selected. |
| X | Delete, without asking. | Yes | Something must be selected. |
Where the copy goes depends on the positioning option in the header and the view direction. The copy either goes to the end of the row, or you move it with the mouse straight away. The interface and your first cabinet describes the positioning options.
Watch out
X deletes the whole cabinet even when only one of its boards is selected, for example a front. The cabinets directly related to it are deleted with it (see Related cabinets). If one shelf is selected, all shelves of that cabinet are deleted. Undo a wrong delete with Ctrl+Z.
Watch out
Don't delete with Del. That is Blender's key and it deletes only the selected object, so the cabinet is left without that board:
- a side panel, top, bottom or back doesn't come back by itself, and the cabinet panel still shows it as if it existed;
- a deleted front or drawer comes back only when you change the front type or the drawer layout;
- if the cabinet itself (the frame) is selected, only the frame is deleted, and its boards are left without a cabinet and don't go into the cutting list.
Undo a wrong delete with Ctrl+Z. Delete a cabinet with X.
Display and view
| Key | Action | On several cabinets | Note |
|---|---|---|---|
| Shift+F | Hide the fronts | All fronts in the project | The key only hides. You bring the fronts back with the fronts button in the EFS tool header. |
| O | Open / close doors and drawers | No | Acts on the active cabinet and the cabinets directly related to it. If anything is open, it closes everything. |
| M | Measures on / off | Whole project | The program remembers the state. The next file opens with the same measures display. |
| W | Zoom to the selection | — | Blender's view action, on an EFS key. |
| E | Zoom to everything | — | The same. |
Watch out
Hidden fronts don't go into the export: they are not in the cutting list, drawings, DXF, labels, order or quote. They don't show in the render either. Before an export, a render or pictures for the customer, bring the fronts back with the button in the header.
Export
| Key | Action | Note |
|---|---|---|
| Ctrl+Shift+E | Production package | Opens a window with the Folder field and checkboxes for the parts of the package. If the project isn't saved, select a folder. The production package and the supplier order describes everything about the package. |
When an EFS key can't act
The keys R, O, Shift+D, Shift+H and X also have a Blender action. When the EFS key's condition isn't met, Blender's action runs.
| Key | When the EFS key doesn't work | What Blender does | How to get back |
|---|---|---|---|
| R | Several objects are selected, or the object isn't a cabinet | Rotating with the mouse | Esc or a right-click |
| O | The cabinet has neither fronts nor drawers, or the object isn't a cabinet | Turns proportional editing on or off (the circle icon in the header) | Press O once more |
| Shift+D | Several objects are selected | Duplicates the selected objects and moves them straight away. Boards are copied, not cabinets. | Esc, then Ctrl+Z |
| Shift+H | Several objects, a shelf, or nothing is selected | Hides everything that isn't selected. If nothing is selected, it hides everything. | Alt+H |
| X | Nothing is selected | Opens the delete menu, which has nothing to delete | Esc |
EFS keys only with the EFS tool
In the add-on preferences, in the Keys box, there is the EFS keys only with the EFS tool checkbox. It is off by default.
- Off: EFS keys work with any tool in the toolbar.
- On: EFS keys work only while the EFS tool is selected. With another tool, Blender's keys apply.
Turn it on if you also work in Blender besides EFS and want Blender's keys on those letters.
Working on several cabinets at once
Selecting with Shift
- Click the first cabinet.
- Hold Shift and click the next one. This adds cabinets to the selection.
- The last cabinet you clicked is the active one. The outline of the active board is a lighter orange, the other selected ones a darker orange.
Shift + click on an already selected cabinet that isn't active makes it active. Shift + click on the active cabinet removes it from the selection. A click in empty space with the EFS tool deselects everything.
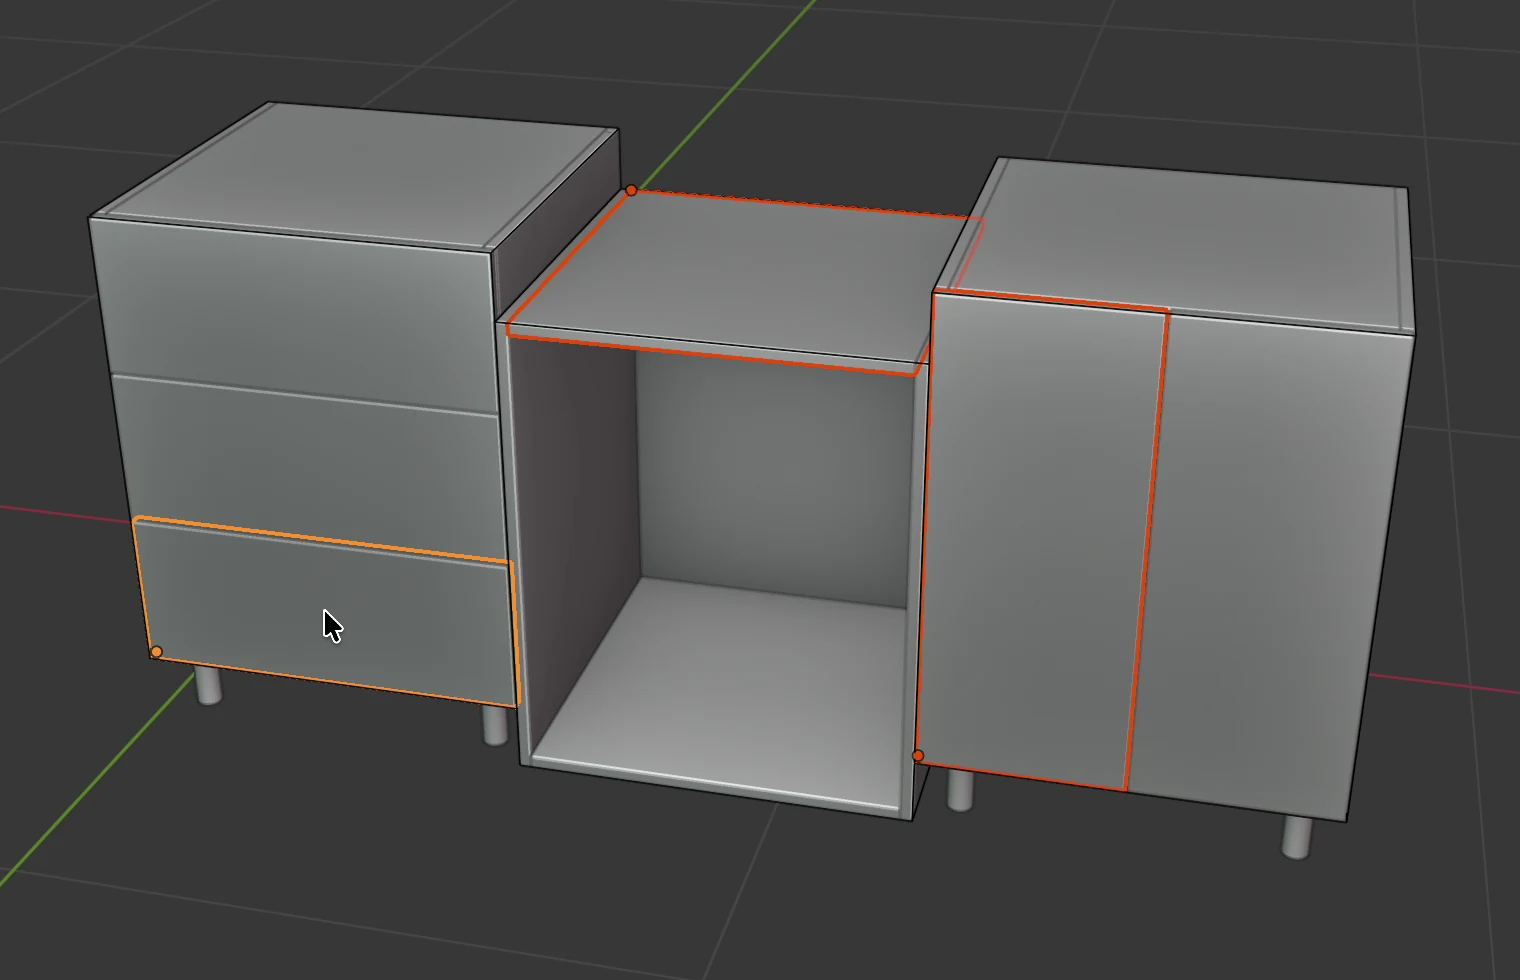
Keys on several cabinets
As in the video:
- Click the second cabinet.
- Hold Shift and click the third.
- Press L. Both cabinets get legs.
- Press F. Both get a front. Each further F changes the front on all of them at once.
F, D, L, Shift+T, U, 1, 2, 3 and X work on all selected cabinets. R, O, Shift+D, Shift+H and Shift+V work on one cabinet only.
The cabinet panel with several selected
When several cabinets are selected, a box with the message 2 cabinets selected: the fields show the active one appears in the EFS - Cabinet tab, at the top of the Cabinet properties panel. The fields below show the values of the active cabinet.
| Button | What it does | When you see it |
|---|---|---|
| Copy to selected cabinets | Opens a window for copying the active cabinet's settings to the others, with checkboxes by group. See Copy to selected cabinets. | 2 or more cabinets |
| Align to active | The selected cabinets get the same height from the floor as the active one. If they face the same way, they also get its back line. | 2 or more cabinets |
| Fill the gap | Between two cabinets: if the gap is 150 mm or more, it adds a cabinet exactly that wide. If the gap is from 20 to 150 mm, it adds a filler flush with the fronts. Below 20 mm it reports The gap is … mm: too narrow to fill. | Exactly 2 cabinets |
| Relate to the selected cabinet | The other cabinet becomes the left, right, upper or lower related cabinet of the active one, depending on where it stands. | Exactly 2 cabinets |
Alt-editing a field
Blender has its own way to make the same change on several objects: hold Alt while you change a field. Drag the value with Alt held, or type a value and confirm with Alt+Enter.
In EFS this works only when the cabinets themselves are selected, not their boards. A click on a cabinet in the 3D viewport selects the board under the mouse (a front, a side panel or the top). Blender then writes the value into the selected boards, not into their cabinets. Only the active cabinet changes, the others stay the same.
The cabinet itself is selected right after C and when you click it in the Scene elements list (on the right, above the Cabinet elements list). That list always selects only one cabinet. So for the same change on several cabinets, use the keys or Copy to selected cabinets. For width, height and depth, turn on the Dimensions checkbox in the copy window.
For advanced users
You select several cabinets themselves with Blender's list of objects under the mouse:
- Hold Shift+Alt and click exactly on the outer edge of the cabinet.
- A list of the objects under the mouse opens. Select the row whose name starts with
frame, for exampleframe.002. That is the cabinet itself. - Repeat for the other cabinets. The last one selected is the active one.
- Hold Alt while you change a field in the Cabinet properties panel.
Tip
Edge tape doesn't have this limit. Select several boards and hold Alt while you change a field in the Edging Tape panel (EFS - Board tab). When several boards are selected, that panel also has the To selected boards button: all selected boards get the edge tape of the active board.
Copy to selected cabinets
You pass the settings of one cabinet, the source, to others. The source is the active cabinet, the one you select last.
- Click a cabinet you are changing.
- Hold Shift and click the other cabinets you are changing.
- Hold Shift and click the source last.
- Right-click and choose Copy to selected cabinets.
- In the window, check the checkboxes by group and click OK.
The program reports how many settings it changed, for example 8 settings copied to 2 cabinets. In the video, after copying, two cabinets got drawers, legs and a back in a groove like the source.
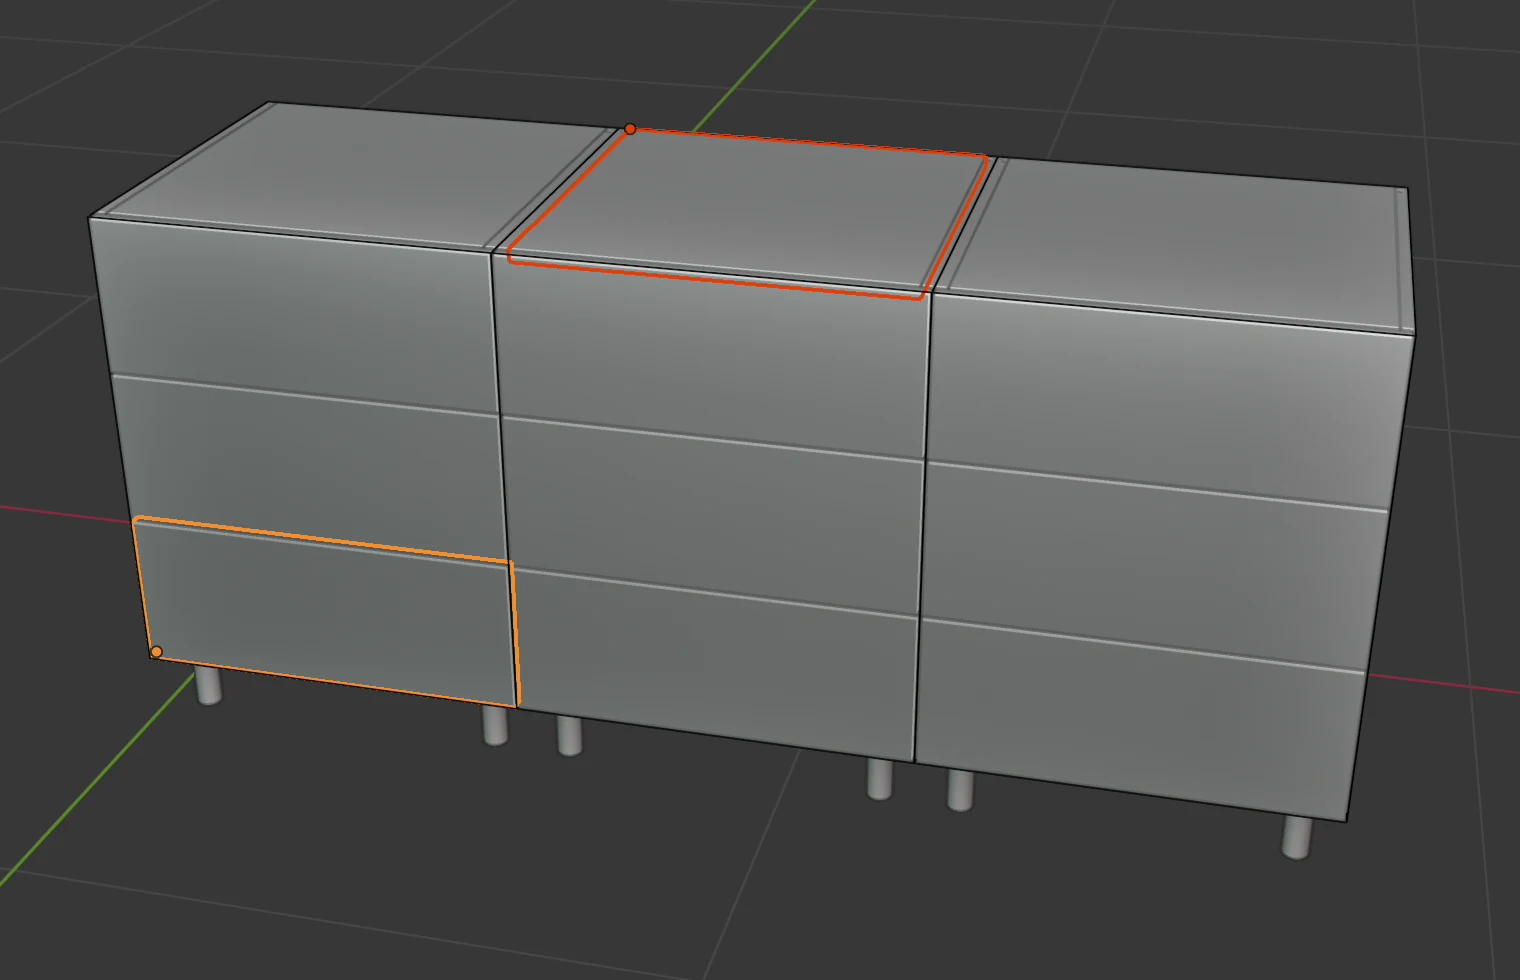
Watch out
The copy goes from the active cabinet to all the other selected ones. If you don't select the source last, some other cabinet is active and its settings overwrite the source. Then press Ctrl+Z and select again, with the source last.
Right-click or the panel button
Right-click → Copy to selected cabinets and the Copy to selected cabinets button in the EFS - Cabinet tab, Cabinet properties panel, open the same window. At the top it says From the active cabinet to 2 more, and below are the checkboxes by group. By default all groups are on except Dimensions and Shelf positions. Turn on what you want and click OK.
Groups
| Group in the window | What it copies | Default |
|---|---|---|
| Dimensions | Width, depth and height | Off |
| Top, bottom and sides | Carcass board thickness, top and bottom construction, joints, overhangs, inset, cross boards, side panels | On |
| Back | Back construction, thickness, gap, overhangs, inset and depth | On |
| Fronts | Front type, Inset, thickness, gap, overhangs, flap lift mechanism | On |
| Drawers | Drawer type and number, drawer front thickness, height and gaps of each drawer | On |
| Shelf positions | Each shelf's offset from equal spacing | Off |
| Handles | Handle, hole spacing, orientation, position and offsets | On |
| Gola | Number of Gola profiles, depth, positions and heights | On |
| Legs | Leg type and height | On |
| Hinges, slides and joints | Hinges and their number, slide type, joint and dowel type, connectors, hangers, shelf supports, hanging rail | On |
| Edging tape | Edge tape on all four edges of every board | On |
| Materials and grain | The decor (material) and grain direction of every board | On |
Copy rules
- Boards are paired by type and in order from the bottom: the edge tape and decor of the source's first drawer go to the target's first drawer, the second to the second. A target board that has no pair in the source stays as it is.
- Only values that differ are written. The number in the message is the settings actually changed.
- Position, rotation, name, note, related cabinets and the wall/base unit state are not copied.
- Shelf positions are copied, but not the shelves themselves. You add shelves with Shift+H and Shift+V.
- Corner cabinets are not copied and don't receive settings.
- The button is grey until at least two ordinary cabinets are selected.
The right-click menu
How to open it
- Click a cabinet to select it.
- Right-click.
The menu applies to the selected cabinets, not to what is under the mouse. So always click the cabinet first, and only then right-click.
With the EFS tool and a board of a cabinet selected, a menu titled Easy Form Studio opens. If the cabinet itself is selected (for example right after C) or you work with another tool, Blender's object menu opens. The EFS items are then at its bottom, under the Easy Form Studio title.
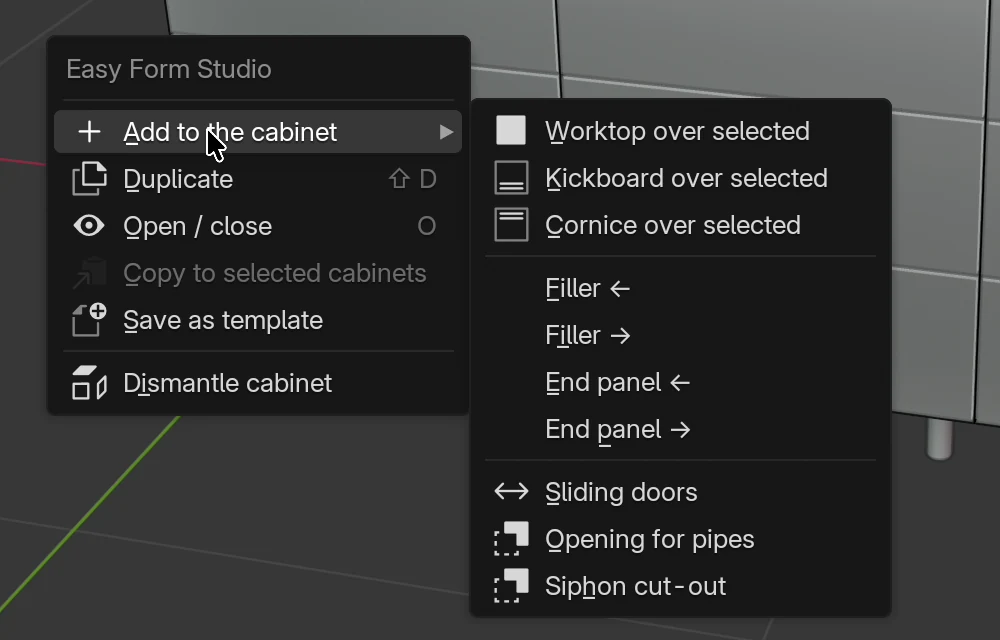
Menu items
| Item | What it does | On several cabinets | More about it |
|---|---|---|---|
| Add to the cabinet | Opens a submenu with parts that are added to the cabinet (table below). | Depends on the item | — |
| Duplicate (Shift+D) | A copy of the whole cabinet. | No. It is grey when several objects are selected. | The interface and your first cabinet |
| Open / close (O) | Opens the doors and drawers of the active cabinet, or closes them if anything is open. | No | How a cabinet is built |
| Copy to selected cabinets | Opens a window with checkboxes by group and copies the active cabinet's settings to the other selected ones. | Yes. It is grey until at least two cabinets are selected. | Copy to selected cabinets |
| Save as template | Opens the Save as template window (Name, Category, Description) and saves the active cabinet, with its related cabinets, in My templates, with a thumbnail. | No | Templates and My templates |
| Dismantle cabinet | The cabinet stops being one object. Every part becomes a free board with the cabinet's name in front, for example "Cabinet 1 - Left". | Yes, all selected | — |
Note
The right-click and the panel button open the same window. In Copy to selected cabinets you choose the groups with checkboxes. In Save as template you type Name, Category and Description: the name is preset to the cabinet's name, and the category to Kitchen upper for a wall unit, otherwise Kitchen lower. Opening for pipes and Siphon cut-out from the Add to the cabinet submenu open their own windows with sizes.
Watch out
Dismantle cabinet can't be reversed except with Ctrl+Z. After dismantling, the parts are no longer a cabinet: F, D and L, copying settings and the cabinet panel don't act on them.
Add to the cabinet
| Item | What it does | On which cabinets | More about it |
|---|---|---|---|
| Worktop over selected | A worktop over the selected base units, one per direction: from the first to the last cabinet, from the wall to the fronts plus the overhang. Thickness 38 mm, front overhang 20 mm. | All selected base units | The worktop: cut-outs and the corner joint |
| Kickboard over selected | A kickboard in front of the legs of the selected base units, one per direction, along the front legs. | All selected base units | Kickboard, fillers, end panels and cornice |
| Cornice over selected | An 18 mm board on top of the selected cabinets, one per direction, 20 mm past the fronts. | All selected | Kickboard, fillers, end panels and cornice |
| Filler ← / Filler → | A strip flush with the fronts along the left or right side of the cabinet, as high as the fronts, 50 mm wide. | The active one | Kickboard, fillers, end panels and cornice |
| End panel ← / End panel → | A board covering the left or right side of the cabinet, from the fronts to the back and from the floor to the top. | The active one | Kickboard, fillers, end panels and cornice |
| Sliding doors | Replaces the cabinet's front with sliding doors on two tracks, with a 30 mm overlap. | The active one | Sliding doors |
| Opening for pipes | A cut-out in the back, open at the bottom. If there are water, drain or gas markers behind the cabinet, the opening takes them in, otherwise it is 300 × 250 mm in the middle. The window shows the proposed sizes. | The active one | Bathroom: siphon and pipes |
| Siphon cut-out | A U-shaped cut-out around the siphon in the back and in the bottom of the top drawer, and of every drawer down to the drain marker behind the cabinet. The window has Width and Depth, default 250 mm. | The active one | Bathroom: siphon and pipes |
Items that work only with base units skip wall units. A corner cabinet doesn't take items from this submenu, so they are grey while only a corner cabinet is selected.
My settings
My settings are your workshop's starting values. You save them from a cabinet built the way you work and from the current project. Every new cabinet starts from their construction and edge tape, and every new project from your hardware, quote and export settings.
Saving
- Build a cabinet the way you work. In the video it has a back in a groove and legs.
- Click it so it is selected.
- In the EFS tab, expand the Easy Form Studio panel.
- In the My settings box, click Save as my settings.
The program reports My settings saved from Cabinet 1. The box shows the date and time of saving, for example Saved 2026-09-30 17:04. While nothing is saved, it says None saved: the add-on defaults apply.
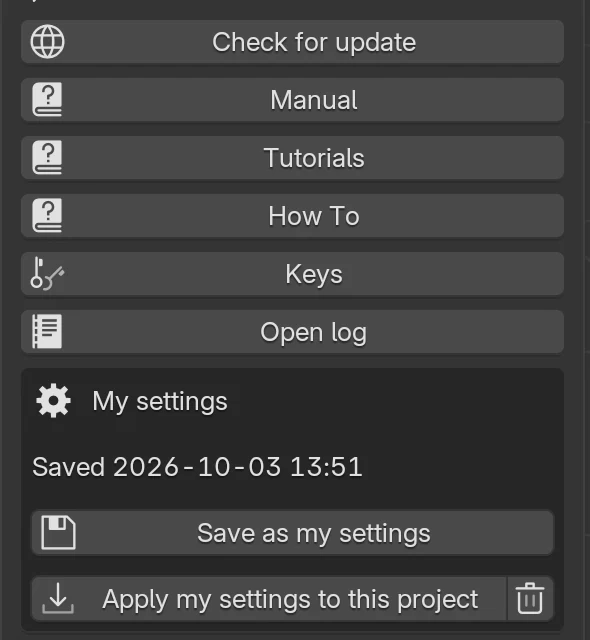
The same My settings box is also in the add-on preferences.
What is saved
| Part | What exactly | From where | When it applies |
|---|---|---|---|
| Construction | Width, height and depth. Thickness of the carcass boards and side panels. Top and bottom: construction, thickness, joints with the side panels, inset. Back: construction, thickness, gap, inset, depth. Front thickness and gap, drawer front thickness. Leg type and height. | The selected cabinet | Every new cabinet |
| Edge tape | Edge tape on the four edges for each type of board the source has: side panels, top, bottom, fronts, drawer parts, shelves, cross boards | The boards of the selected cabinet | Every new board of that type |
| Project hardware | Joint and dowel type, connectors, hinges and number of hinges, flap lift mechanism, hangers, slides, shelf supports, the handle and its position | The current project | Every new project |
| Quote | Labor, Margin %, Waste %, VAT %, Currency | The current project | Every new project |
| Export | The checkboxes of the Export panel (cabinet drawings, CNC boards, DXF, MPR, CIX, vector PDF, nesting) and Nesting: saw kerf (mm) | The current project | Every new project |
| Wall units | Upper elements height | The current project | Every new project |
Not saved:
- the front type, drawers, shelves, Gola and the cabinet's decors;
- the workshop details for the quote (they are in the add-on preferences, in the Workshop (customer quote) box);
- the board price list (see Nesting and board prices);
- the customer details and the quote number.
A new cabinet gets its hardware and handles from Project hardware. That is why My settings save the hardware as project settings, not as cabinet settings. Project hardware describes the project hardware.
Watch out
Saving takes the quote and export settings from the project that is open. If you gave a customer a special margin in this project, it becomes the starting margin for every new project. Check these values before saving.
If you click Save as my settings while no cabinet is selected, only the project settings are saved. The program reports Project settings saved; select a cabinet to save its construction too. The previously saved construction and edge tape stay. If several cabinets are selected, the construction is saved from the active one. A corner cabinet can't be saved as the construction source.
When they apply
- A new cabinet (C or Add → Cabinet) gets the construction and edge tape from My settings. If it comes next to a selected cabinet, it takes the height and depth from that neighbour, and the rest from My settings.
- A new board in an existing cabinet gets the edge tape from My settings for its type: doors added with F, a new drawer, shelf or cross board.
- A new project gets the hardware, quote, export and wall unit height. A new project is an empty file that hasn't been saved yet and has no EFS cabinets, for example when you start the program.
- Fill the gap adds a new cabinet for a gap of 150 mm or more, so that cabinet also starts from My settings.
My settings don't apply to:
- existing cabinets and projects you open;
- the corner cabinet;
- cabinets from templates, which bring their own settings;
- copies made with Shift+D, which carry the original's settings.
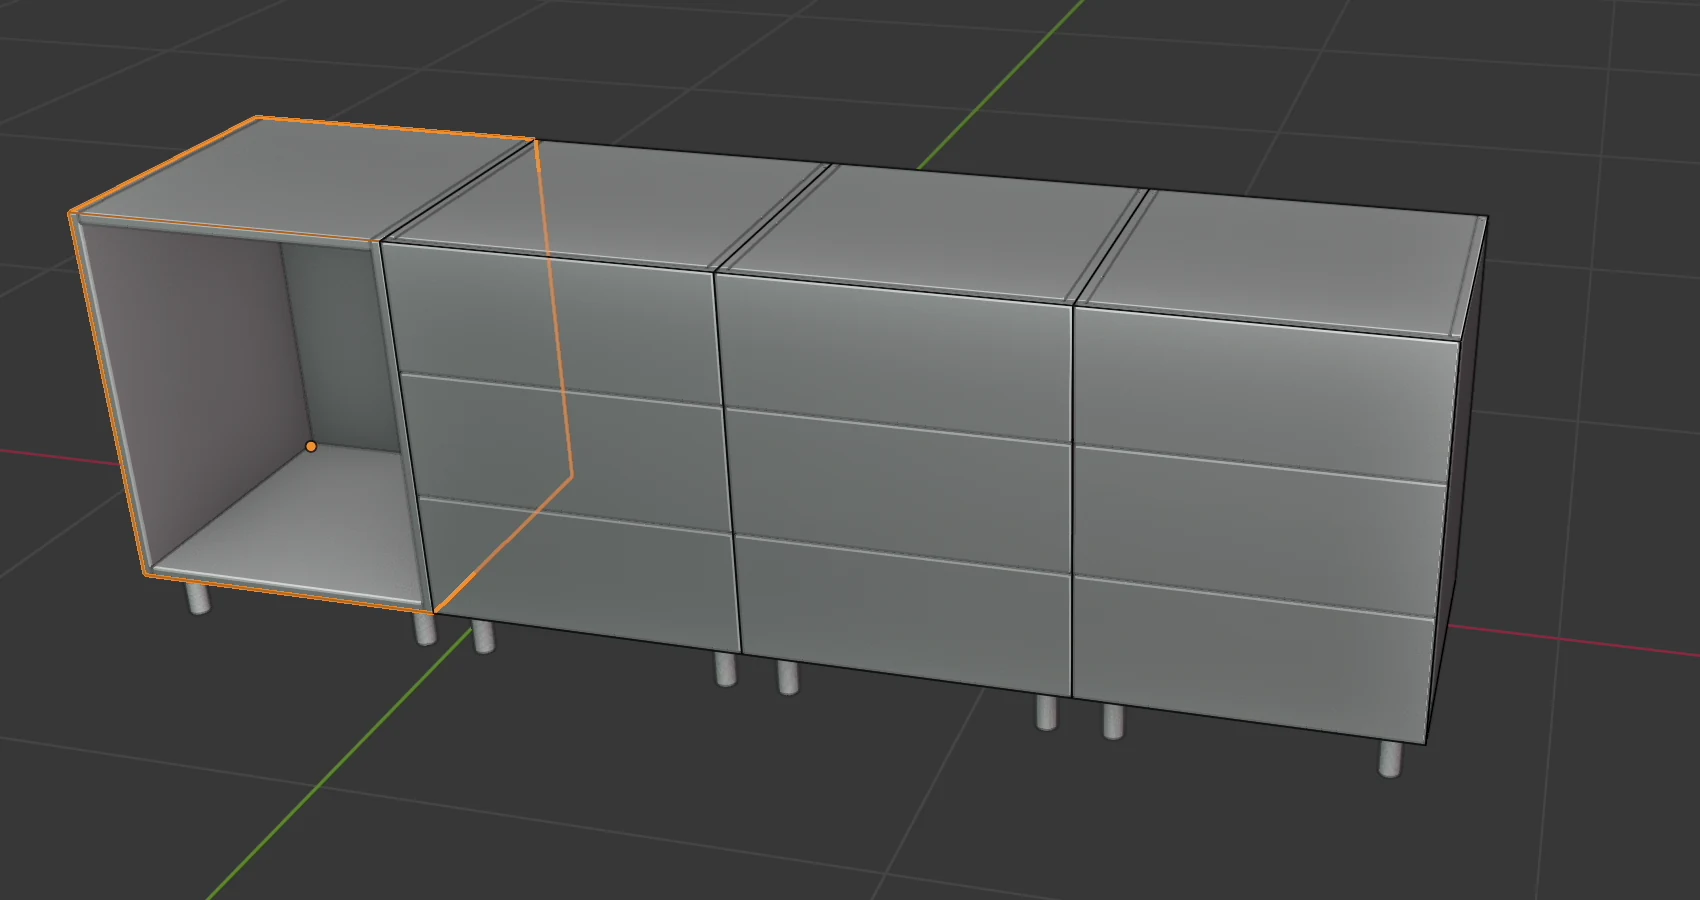
A new cabinet added next to a selected wall unit becomes a wall unit and doesn't get the legs from My settings.
Apply my settings to this project
When you open an older project, it keeps its own settings. To give it your hardware, quote and export:
- In the EFS tab, expand the Easy Form Studio panel.
- In the My settings box, click Apply my settings to this project.
The project takes the saved hardware, quote and export settings. Existing cabinets stay as they are. To give existing cabinets the new hardware, click Apply to all or Apply to selected in the Project hardware panel (see Project hardware).
Forget my settings
- In the My settings box, click the trash icon next to Apply my settings to this project.
- Confirm.
The saved settings are deleted. New cabinets and projects start again from the add-on defaults. Existing cabinets and projects don't change. You don't need to delete to get different My settings: save the new ones over the old ones.
Options
| Button | What it does | When it is grey |
|---|---|---|
| Save as my settings | Saves the construction and edge tape of the selected cabinet and the project settings. Overwrites the previous save. | Never |
| Apply my settings to this project | Gives the open project the saved hardware, quote, export and wall unit height | While nothing is saved |
| Trash icon (Forget my settings) | Deletes the saved settings, after you confirm | While nothing is saved |
Where they are on disk
My settings are in the defaults.json file in the EFS user data folder. The same folder holds the error log and your board price list. Install, licence and account describes where that folder is.
- Mac, EasyFormStudio app:
~/Library/Application Support/EasyFormStudio/5.2/extensions/.user/user_default/efs/defaults.json - Windows, EasyFormStudio app:
%APPDATA%\Blender Foundation\Blender\5.2\extensions\.user\user_default\efs\defaults.json
Updating the add-on doesn't touch that folder, so My settings stay after every update. If you delete the file by hand, it is the same as Forget my settings. You can copy the file into the same folder on another computer.
Related cabinets
A related cabinet is a neighbour that goes together with a cabinet. When you move the cabinet, the related one moves with it and stays next to its left, right, upper or lower side.
How to relate cabinets
- A new cabinet: in the add-on preferences, turn on Relate a new cabinet to the selected one. It is off by default. When it is on, a new cabinet added with C next to the selected one becomes its left or right related cabinet.
- Two existing ones: select both, with the main cabinet last. In the Cabinet properties panel, click Relate to the selected cabinet. The other cabinet becomes the left, right, upper or lower related cabinet, depending on where it stands. The program reports, for example, Related on the right.
You see and change the relations in the EFS - Cabinet tab, Cabinet properties panel, Relations subpanel. It has the fields Left, Right, Above and Below, each with its own offset, and the checkboxes under Include in scaling: Width, Depth and Height.
What a relation does
- The related cabinet moves together with the cabinet.
- When Include in scaling is on, a change of width, depth or height is passed on to the related cabinet. It is passed only to the direct neighbour, not further along the row. That way cabinets you didn't touch don't change.
- Next to the Width field, the panel shows Joint width, the total width of the cabinet with its left and right related cabinets.
- O opens the doors and drawers of the directly related cabinets too.
- Save as template saves the cabinet together with its related cabinets.
- Related cabinets are not listed separately in Scene elements, only the cabinet they are related to.
Watch out
X on a cabinet also deletes the cabinets directly related to it.
Base units and the corner also covers related cabinets in a kitchen run.
Common problems and solutions
The key doesn't work. The mouse pointer isn't over the 3D viewport. Move it over the 3D viewport and press again. Also check that the header shows Object Mode.
The keys work only sometimes. EFS keys only with the EFS tool is on, and another tool is selected. Select the EFS tool or turn the checkbox off.
U doesn't switch between wall and base unit. Developer tools is on in the add-on preferences, which gives U another use. Turn that checkbox off.
F or L changes only one cabinet. The other cabinet isn't selected. Add it to the selection with Shift + click. F, D, Shift+T and U don't act on a corner cabinet.
A key changes a cabinet even though nothing is selected. A click in empty space deselects everything, but the last cabinet stays active. The cabinet panel still shows it, and F, D, L, Shift+T, U, R, O and 1 / 2 / 3 act on it. Undo with Ctrl+Z. Before pressing a key, click the cabinet you want to change.
R rotates with the mouse instead of by 90°. Several objects are selected. Press Esc, select one cabinet and press R again.
After O, other cabinets move together with the selected one. On a cabinet without fronts and drawers, O turned on Blender's proportional editing. Press O once more or turn off the circle icon in the header.
Everything has disappeared except the selection. Shift+H was pressed with several objects selected, on a shelf or with nothing selected, so Blender hid everything else. Press Alt+H.
The fronts have disappeared or are missing from the cutting list. Shift+F was pressed. Hidden fronts don't go into the export. Bring them back with the fronts button in the EFS tool header.
X deleted the whole cabinet or several cabinets. X deletes the whole cabinet even when one board is selected, together with the directly related cabinets. Press Ctrl+Z.
Copy to selected cabinets is grey. Only one ordinary cabinet is selected. Select at least two. Corner cabinets don't count.
The copy changed the source instead of the other cabinets. The source wasn't selected last. Press Ctrl+Z and select again, with the source last (Shift + click).
The copy didn't change the width or the shelf positions. The Dimensions and Shelf positions groups are off by default. Copy again and turn on those checkboxes in the window.
Alt-editing changed only the active cabinet. Boards are selected, not the cabinets themselves. Use Copy to selected cabinets with the Dimensions checkbox, or the keys.
Duplicate is grey in the menu. Several objects are selected. Select one cabinet.
The right-click doesn't show the Easy Form Studio menu. The cabinet itself is selected or you are working with another tool, so Blender's object menu opened. The EFS items are at its bottom, under Easy Form Studio. When a free board is selected with the EFS tool, the right-click doesn't open a menu.
The new cabinet doesn't have My settings. The cabinet is a corner cabinet, from a template, or a copy, and My settings don't apply to these. If you saved without a cabinet selected, only the project settings were saved. Select a cabinet and save again.
The new cabinet has the neighbour's height, not the one from My settings. The cabinet was added next to the selected cabinet and took its height and depth. Before C, click in empty space so that nothing is selected.
The opened project doesn't have my hardware. My settings apply to new projects. Click Apply my settings to this project.
Shortcuts in this chapter
| Key | Action |
|---|---|
| C | New cabinet |
| Shift+C | New corner cabinet |
| B | New free board |
| Shift+H | New horizontal shelf |
| Shift+V | New vertical shelf |
| Shift+D | Duplicate the cabinet |
| X | Delete |
| 1 / 2 / 3 | Move along X / Y / Z |
| R | Turn the cabinet by 90° |
| U | Upper / lower cabinet |
| F | Next front |
| Shift+F | Hide the fronts |
| D | Next drawer layout |
| L | Next legs |
| Shift+T | Next top |
| O | Open / close doors and drawers |
| M | Measures on / off |
| W | Zoom to the selection |
| E | Zoom to everything |
| Ctrl+Shift+E | Production package |
| Shift + click | Add a cabinet to the selection |
| Alt + field change | The same change on all selected objects |
| Shift+A | Add menu (EFS items under Easy Form Studio) |
| Alt+H | Show everything Blender has hidden |
| Ctrl+Z | Undo the last action |
| right-click | Cabinet menu |
All keys in one place are in Keyboard shortcuts.
Next
This is the last chapter of the Start here part. The next part is Kitchen from A to Z: one project, from the room to the quote for the customer.
Next chapter: Room, openings and installations