Bathroom: siphon and pipes
A cabinet under a washbasin needs an opening in the back for the water and drain connections and a cut-out in the drawer around the siphon. EFS cuts both into the boards: Opening for pipes in the cabinet's back, Siphon cut-out in the back and bottom of the drawer. The cut boards go into the cutting list as CNC boards and into the DXF with the outline of the cut-out. In this chapter you place a wall-hung vanity unit from the templates, with its top edge at 850 mm, and cut both cut-outs to match the installations drawn on the wall.
Video: D03 Bathroom: siphon and pipes
The same workflow in a one-and-a-half-minute video.

Before you start
- Draw the room and add the water, drain and gas marks to the wall behind the washbasin. EFS uses them to suggest the sizes and position of the cut-outs. How to draw them is in the chapter Room, openings and installations. Without marks the cut-outs work, but with default sizes in the middle of the cabinet.
- For Opening for pipes the cabinet must have a back. For Siphon cut-out it must have drawers.
- Cut the cut-outs last, when the sizes of the cabinet and the drawers are final (see When you change the cabinet after the cut-outs).
The workflow from the video
In the video the bathroom is 2400 × 2200 × 2500 mm. On wall A there are two water marks and a drain mark.
- Open the EFS - Templates tab, the Cabinet templates panel, and the Bathroom category.
- In the search field type
vanity 1200and press Enter. - Click Vanity 1200, 2 drawers. The cabinet lands in the corner, in front of the water and drain marks, with its top edge at 850 mm.
- Click the cabinet, right-click, then Add to the cabinet → Opening for pipes.
- The window suggests Width 300 mm and Height 330 mm. Change Height to 350 mm and click OK.
- Look at the cabinet from behind: the water and drain marks show through the opening in the back.
- Click the cabinet, right-click, then Add to the cabinet → Siphon cut-out. Confirm Width 250 mm and Depth 250 mm by clicking OK.
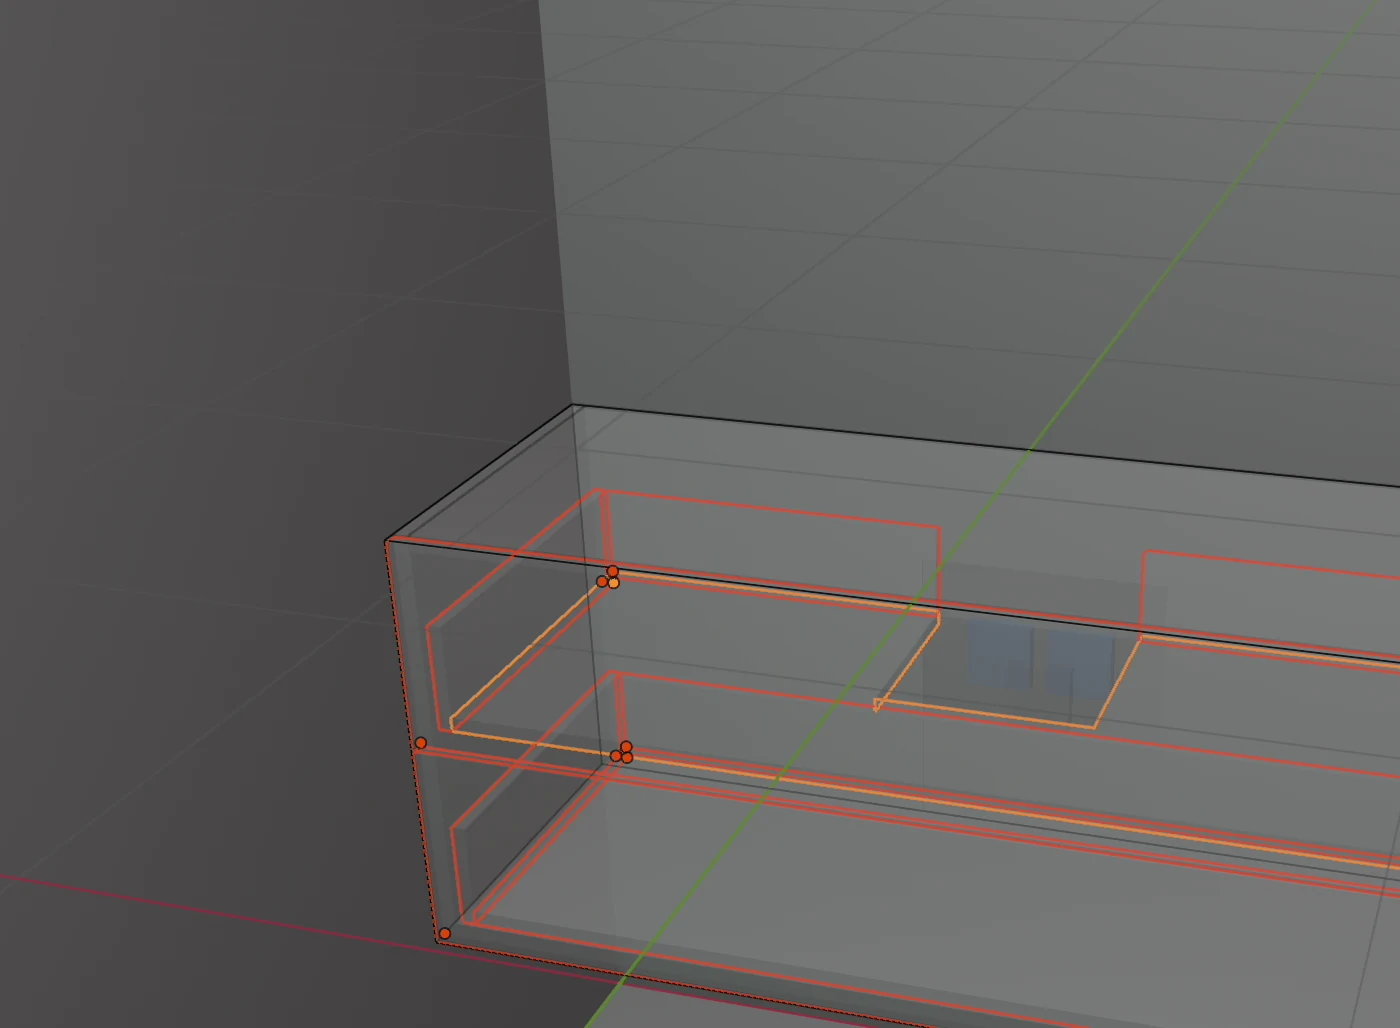
- Look from above in the X-ray view (Alt+Z): the back of the top drawer is cut through its full height, and the bottom has a U-shaped cut-out.
The vanity unit
- Click an empty part of the 3D view, so that nothing is selected.
- In the EFS - Templates tab, open the Bathroom category.
- Click the button with the template's name, e.g. Vanity 1200, 2 drawers.
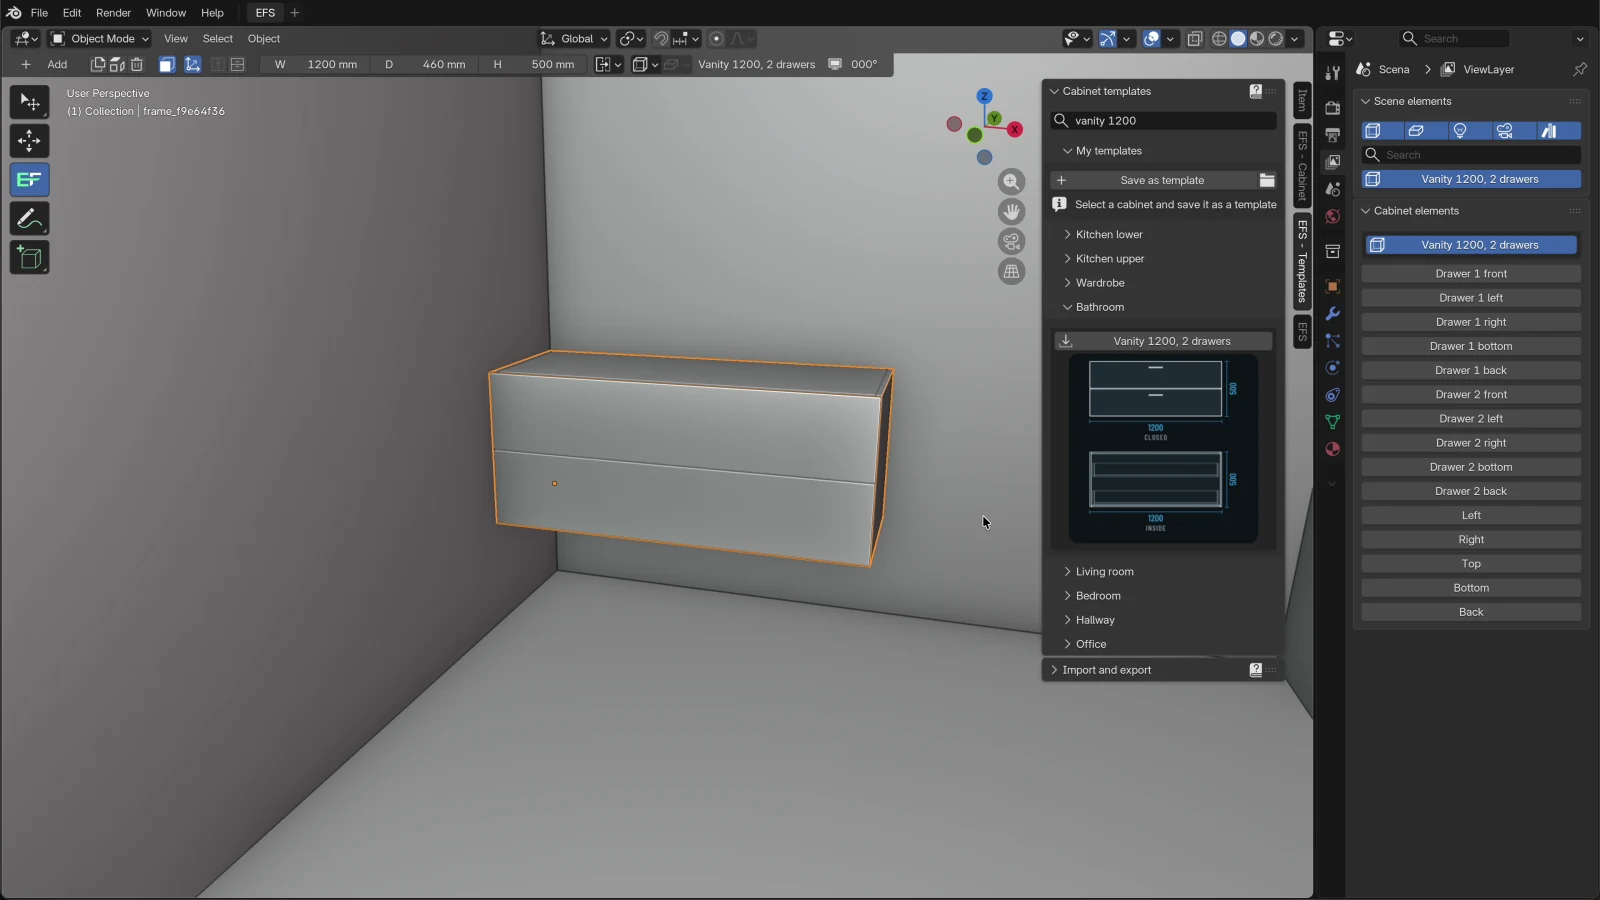
Where a template lands and how to move it is in the chapter Templates and My templates.
Vanity templates
| Template | W × D × H | Fronts | Back | Opening for pipes | Siphon cut-out |
|---|---|---|---|---|---|
| Vanity 1200, 2 drawers | 1200 × 460 × 500 mm | two outer drawers, 250 mm each | lay-on, 3 mm | yes | yes |
| Vanity 600, 2 drawers | 600 × 460 × 500 mm | two outer drawers, 250 mm each | lay-on, 3 mm | yes | yes |
| Vanity 800, 2 doors | 800 × 460 × 500 mm | two doors | none | no: The cabinet has no back. | no: The cabinet has no drawer. |
The other bathroom templates (mirror cabinet, wall cabinet, tall bathroom cabinet) are in the list of templates.
Height 850
All three vanity templates hang on the wall, without legs:
- the cabinet's bottom is 350 mm above the floor and the carcass height is 500 mm, so the top edge is at 850 mm;
- the cabinet is not an Is upper cabinet, so its fronts stay in group F 1;
- the Depth of 460 mm includes the drawer fronts and the back.
For another height, move the cabinet: select it, press 3, type the offset and press Enter. For example 50 raises the top edge to 900 mm. See Moving: 1, 2 and 3.
Tip
Place the cabinet so that its centre is in front of the drain. Move it with the 1 key by the difference between the centre of the cabinet and the drain mark. Then both the opening and the siphon cut-out are in the middle.
Note
The Hardware and joints box offers Wall unit hangers only when Is upper is on. The vanity unit therefore has no hangers in the hardware list. Order the wall-hanging hardware yourself.
Installation marks behind the cabinet
You add the marks in the EFS tab, Room properties panel, Openings and installations box: the + button, then Water, Drain or Gas. For each mark you enter Wall, From wall start (to the centre of the mark) and Height from floor. The details are in the section Openings and installations.
On the wall each mark is an 80 × 80 mm square: the water mark is blue, the drain grey and the gas yellow. The square starts at the entered Height from floor and goes 80 mm up. EFS calculates the cut-outs from this square. EFS takes a mark as “behind the cabinet” when:
- the room is on (Show room in the Room properties panel);
- the mark lies at least partly within the width and height of the cabinet's back;
- it is at most 250 mm behind the back (the cabinet stands against the wall or close to it).
Marks above or below the cabinet, to its left or right, and on another wall don't count.
| Cut-out | Which marks it looks at |
|---|---|
| Opening for pipes | water, drain and gas |
| Siphon cut-out | drain only |
The marks in the video:
| Mark | Wall | From wall start | Height from floor | Square on the wall |
|---|---|---|---|---|
| Water | A | 550 mm | 550 mm | 510–590 mm, height 550–630 mm |
| Water | A | 650 mm | 550 mm | 610–690 mm, height 550–630 mm |
| Drain | A | 600 mm | 500 mm | 560–640 mm, height 500–580 mm |
Opening for pipes
A rectangular opening in the cabinet's back, open at the bottom, for the pipes to come in.
- Click the cabinet.
- Right-click, Add to the cabinet → Opening for pipes.
- The window shows the suggested sizes. Change them if needed.
- Click OK.
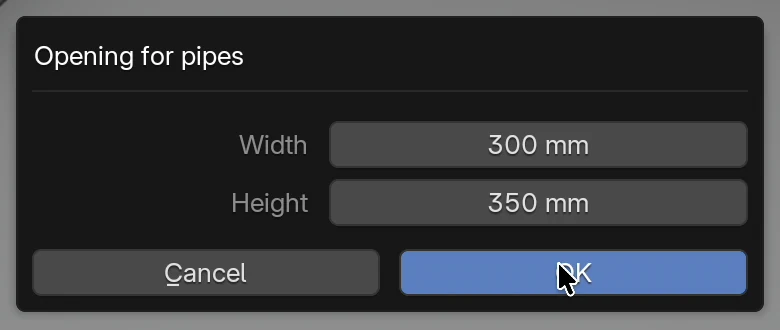
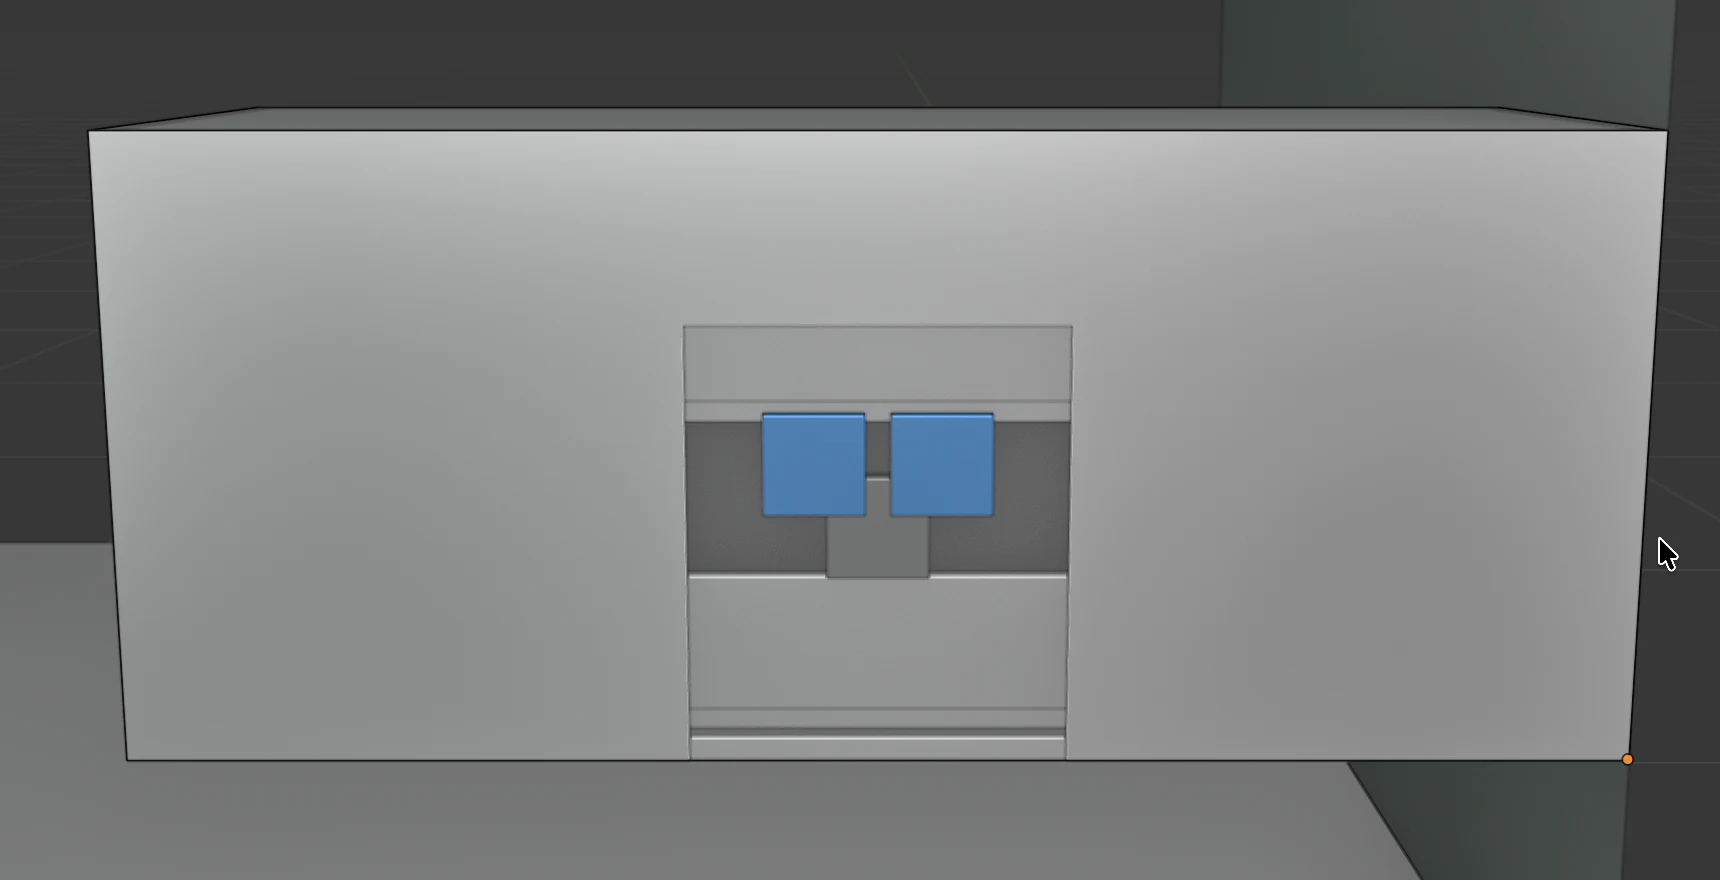
The Opening for pipes window
| Option | What it does | Default | Values |
|---|---|---|---|
| Width | Width of the opening. | suggested from the marks, 300 mm without marks | 0–1000 mm; 0 means the suggested size |
| Height | Height of the opening from the bottom edge of the back upwards. | suggested from the marks, 250 mm without marks | 0–1000 mm; 0 means the suggested size |
| OK | Cuts the opening. | – | button |
| Cancel | Closes the window without cutting. | – | button |
You don't enter the left-right position of the opening: EFS sets it itself.
How EFS suggests the opening
Without marks behind the cabinet the opening is 300 × 250 mm, in the middle of the back. With marks:
- EFS takes all water, drain and gas marks behind the cabinet.
- It adds 50 mm of clearance round them on the left, right and top.
- Width is the distance from the left to the right edge of that frame, and at least 300 mm.
- Height is from the bottom edge of the back to the top edge of the frame, at least 250 mm and at most up to the top of the back.
- The centre of the opening is at the centre of the marks.
Example from the video: the marks run from 510 to 690 mm, and the top edge of the highest mark is at 630 mm. With the clearance that is 460–740 mm, i.e. 280 mm, so Width becomes 300 mm. The back starts at 350 mm, so Height is 630 + 50 − 350 = 330 mm. The centre of the opening is at 600 mm, in front of the drain.
Rules
- The opening goes into the cabinet's back only. The bottom, the side panels and the cross rails stay whole.
- The opening is always open at the bottom, down to the bottom edge of the back.
- The opening stays within the back. If with the suggested centre it would go over the edge of the back, EFS moves it towards the middle.
- A back with an opening becomes a CNC board (see Cutting list, DXF and drawings).
- A cabinet without a back reports The cabinet has no back. and cuts nothing.
- Every Opening for pipes cuts into the already cut back. A second, larger opening widens the first. For a smaller opening, first undo the cut with Ctrl+Z.
Watch out
Width and Height must be smaller than the back. An opening as high as the back cuts it into two pieces, and an opening as wide as the back cuts off its whole lower part.
Tip
If the opening is not where the pipes are, check the marks on the wall, not the sizes in the window. Undo the cut with Ctrl+Z, correct From wall start and Height from floor of the marks and repeat Opening for pipes.
Siphon cut-out
A U-shaped cut-out round the siphon in the drawer, so that the drawer passes the drain: the drawer back is cut through its full height, and the bottom gets a cut-out from the back edge forwards.
- Click the cabinet.
- Right-click, Add to the cabinet → Siphon cut-out.
- Type Width and Depth or leave 250 mm.
- Click OK.
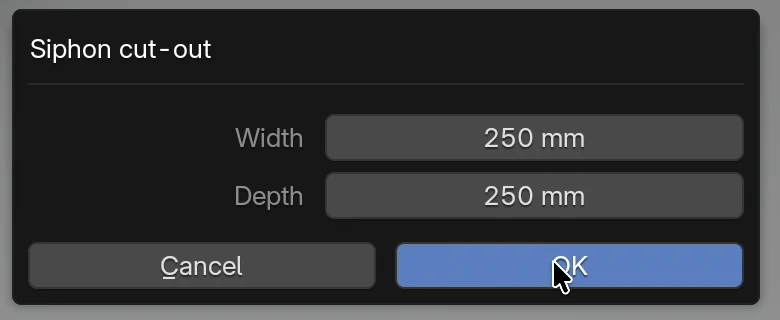
The Siphon cut-out window
| Option | What it does | Default | Values |
|---|---|---|---|
| Width | Width of the cut-out, left to right. It is the same in the back and in the bottom of the drawer. | 250 mm | 50–600 mm |
| Depth | How far the cut-out goes into the drawer bottom, from the back edge forwards. | 250 mm | 50–500 mm |
| OK | Cuts the cut-out. | – | button |
| Cancel | Closes the window without cutting. | – | button |
The window remembers the last sizes entered until you close the program.
Which drawers get the cut-out
| Behind the cabinet | Which drawers | Where the cut-out is, left to right |
|---|---|---|
| No drain mark | Only the top drawer | In the middle of the drawer |
| A drain mark | The top drawer and every drawer whose back reaches above the bottom edge of the drain mark | At the centre of the drain mark. If there are several, midway between them. |
Drawers are counted from the bottom: in a cabinet with two drawers the top one is Drawer 2. Example from the video: the drain is at 500 mm, and the back of the lower drawer ends at 498 mm, so only the top drawer gets the cut-out. If the drain were at 400 mm, both would get it.
What is cut
| Board | Cut-out |
|---|---|
| Drawer back (Drawer 2 back) | Cut through its full height, in the width of the cut-out. Two pieces are left from one board. |
| Drawer bottom (Drawer 2 bottom) | A U-shaped cut-out Width × Depth, open towards the back edge. |
| Drawer front and drawer sides | Not cut. |
| Cabinet back | Not cut. For it use Opening for pipes. |
Rules:
- A cabinet without drawers reports The cabinet has no drawer. and cuts nothing.
- Depth must be smaller than the depth of the drawer box, otherwise the bottom is cut into two pieces. In a 460 mm deep cabinet the drawer box is 429 mm deep.
- Width must be smaller than the width of the drawer back. In a 600 mm wide cabinet the drawer back is 512 mm wide, and in a 1200 mm cabinet 1112 mm.
- A repeated Siphon cut-out cuts into the already cut boards. For a smaller cut-out, first undo with Ctrl+Z.
Cutting list, DXF and drawings
The cut boards are CNC boards: they have an outline that is not a rectangle.
| Export | What you get |
|---|---|
| Cutting list (Cutting list to Excel, PDF) | The board stays one row, with the size of the whole board. In the CNC column it gets the label CNC 1, CNC 2… (see CNC mark) |
| DXF (Export DXF - all, Export DXF - selected) | The outline of the board with the cut-out. The drawer back is two pieces from one board: both outlines are in the DXF, in the CONTOUR layer. |
| PDF drawings | A drawing of the cut board, when CNC boards is on in Export → Settings (on by default). See Export settings. |
| Measures in the view (M) | On the cut board, the sizes of the board and the cut-out. |
| Cost estimate and quote | The boards are priced as before. The cut-outs have no item of their own. |
Example from the video: three CNC boards, Back with a 300 × 350 mm opening, Drawer 2 back cut through in a width of 250 mm and Drawer 2 bottom with a 250 × 250 mm cut-out.
Rules:
- With DXF: only CNC and drilled (Export → Settings) the cut boards always go into the DXF, and plain rectangular boards don't.
- For the drawer back, the CNC cuts two pieces from one board. The cutting list has one row with the size of the whole board: one board is cut to size, not two.
- The size in the cutting list is the size of the rectangle round the board. The cut-out doesn't change Length or Width.
Details of the cutting list columns and the DXF layers are in the chapters Cutting list and cut size and Drillings, DXF, MPR and CIX.
Tip
Save the cabinet with the cut-outs as your own template (see My templates). The cut boards are saved with their outline, so the next washbasin cabinet comes already cut.
When you change the cabinet after the cut-outs
EFS doesn't recalculate the cut-outs:
| Change | What happens to the cut-out |
|---|---|
| Width, Height or Depth of the cabinet | The cut board stretches or shrinks, and the cut-out with it. The sizes of the cut-out are no longer the ones you entered. |
| Type or number of drawers | EFS makes new drawers, without the siphon cut-out. |
| Moving the cabinet | The cut-out stays where it was on the board, and the marks on the wall are not looked at again. |
If you changed the sizes after the cut-outs, undo the changes with Ctrl+Z back to before the cut-outs, change the sizes and cut again. If it is too late to undo, place the cabinet again from the template.
Common problems and solutions
Opening for pipes and Siphon cut-out are grey. Nothing is selected, a corner cabinet or a free board is selected, or you are in Edit Mode. Click a board of the cabinet. Leave Edit Mode with Tab.
The message The cabinet has no back. The cabinet has no back (e.g. Vanity 800, 2 doors). The pipes then pass without an opening. If you need a back, in the EFS - Cabinet tab, Construction → Back box, set Construction to Lay-on (see Back).
The message The cabinet has no drawer. The cabinet has doors or no fronts. The siphon cut-out cuts drawers only.
The opening is 300 × 250 mm in the middle, and the pipes are elsewhere. EFS found no marks behind the cabinet: the room is off, the marks are not drawn, they are on another wall, below or above the cabinet, or more than 250 mm behind it. Undo with Ctrl+Z, correct the marks and repeat.
The siphon cut-out is only in the top drawer, and the drain is lower. The drain mark is not behind the cabinet or is below its bottom. Correct Height from floor of the drain mark, undo the cut-out and repeat.
The siphon cut-out is not in front of the drain. Without a drain mark the cut-out is in the middle of the drawer. Draw the drain or move the cabinet so that its centre is in front of the drain.
The opening is too small. Repeat Opening for pipes with larger sizes: the new opening widens the old one.
The opening or cut-out is too large. Undo with Ctrl+Z and cut again with smaller sizes.
The back has split into two pieces. The Height of the opening was greater than the back. Undo with Ctrl+Z and type a smaller height.
The siphon cut-out has disappeared. You changed the type or number of drawers. Repeat Siphon cut-out.
The cut-out has stretched. You changed the cabinet's sizes after the cut-out. See When you change the cabinet after the cut-outs.
Shortcuts in this chapter
| Key | Action |
|---|---|
| right-click | Menu with Add to the cabinet → Opening for pipes and Siphon cut-out |
| Alt+Z | X-ray view: the cut-outs in the drawers are visible |
| M | Measures: sizes of the cut boards |
| 1 | Move the cabinet left-right, in front of the drain |
| 3 | Move the cabinet up-down, for another washbasin height |
| Ctrl+Z | Undo the cut-out |
All shortcuts are in the chapter Keyboard shortcuts.
Next
Next chapter: Hallway and living room from templates