Templates and My templates
Templates are ready-made cabinets: kitchen base and wall units, wardrobes, bathroom, living room, bedroom, hallway and office. In this chapter you put together a kitchen run from templates and save your own template together with a worktop. At the end is a list of all 80 templates that come with the program.

Show me in the program
The interactive tour Templates (2 min) shows you in the program where to click and what to type, step by step. In the EFS tab, open the Interactive tours panel and click Start next to the tour. The AI assistant also offers it when you ask how to do this.
Before you start
- Open a project. A room is not required, but with one you see straight away where the corner is (see Room, openings and installations).
- Select the EFS tool (the icon with the logo in the toolbar on the left), as in the chapter The interface and your first cabinet.
- Open the sidebar with N if it is closed.
The EFS - Templates tab
The templates are in the EFS - Templates tab on the edge of the sidebar. It has two panels:
- Cabinet templates: the search field, My templates and eight categories of built-in templates;
-
Import and export: import and export of a single cabinet as a JSON file.
-
Click the EFS - Templates tab.
- Open the Cabinet templates panel.
- Open a category, for example Kitchen lower.
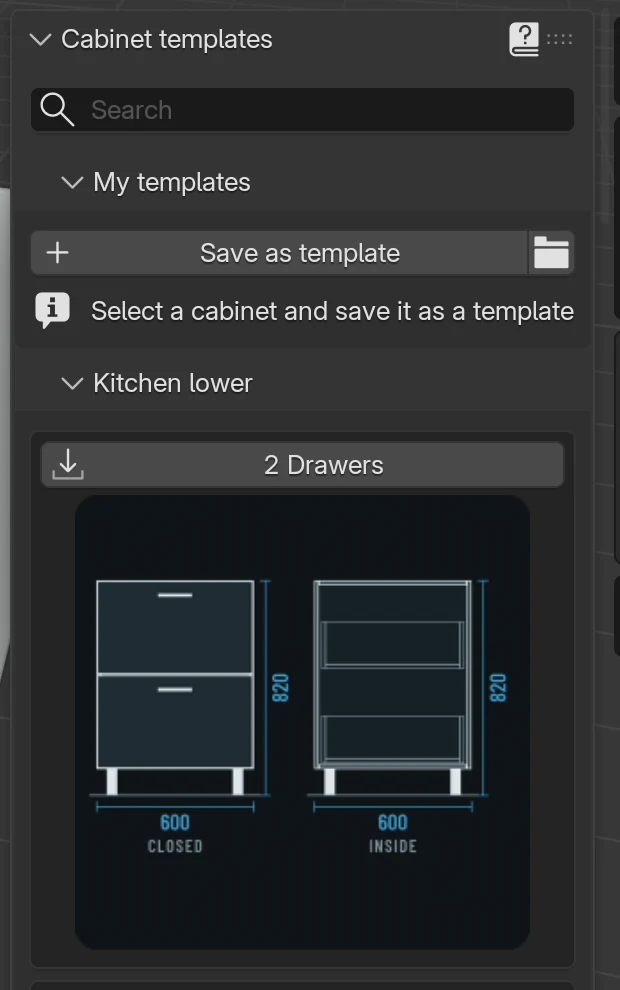
Each template is one card:
- at the top is a button with the name and an arrow icon; clicking it places the template in the scene;
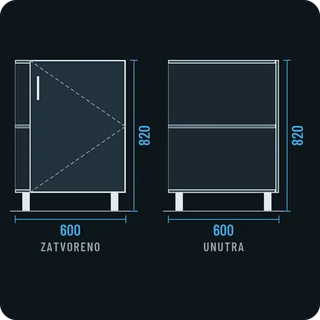
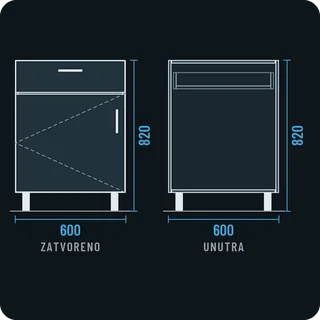
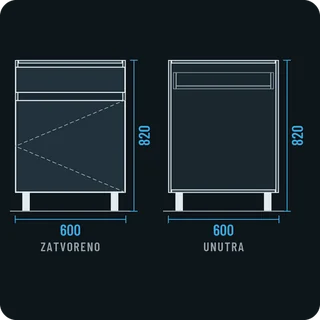
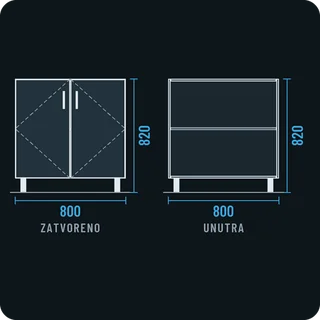
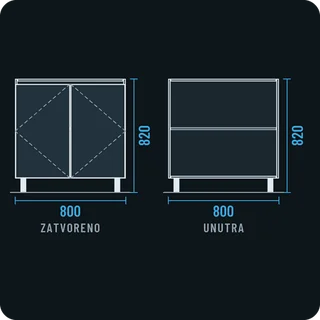
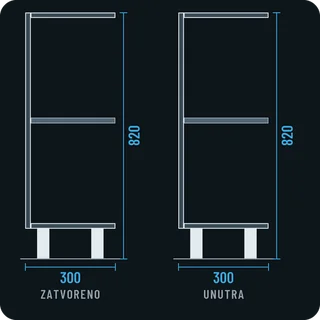
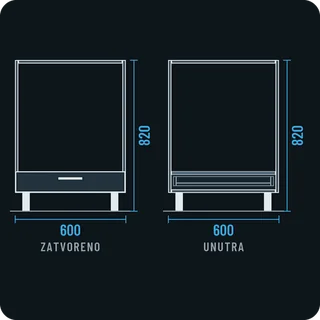
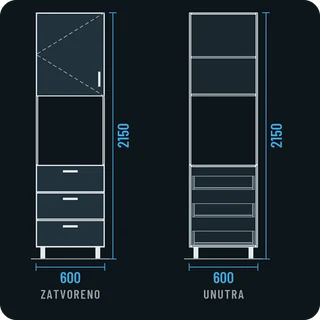
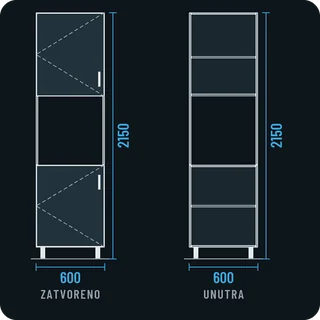
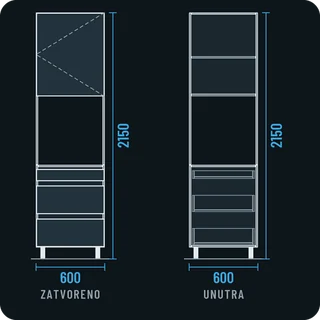
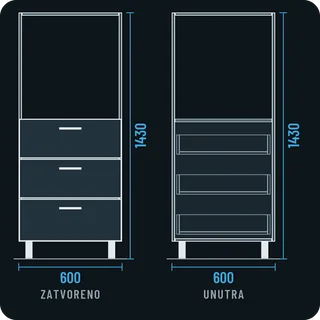
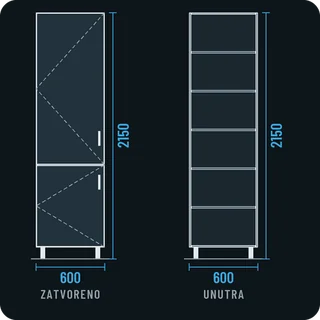
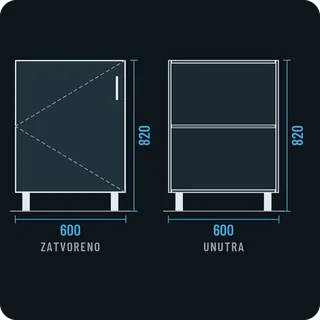
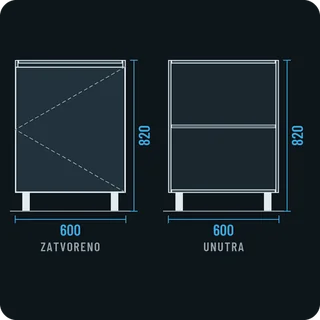
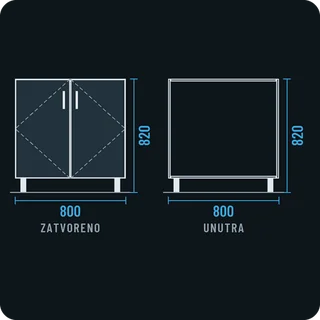
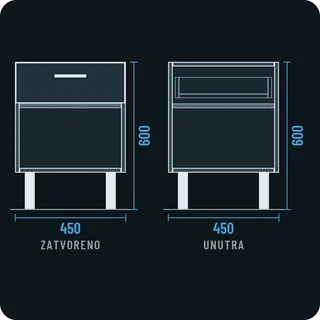
- below it is a thumbnail: on the left the cabinet closed, on the right inside (without fronts), and for corner cabinets the plan;
- the thumbnail shows the overall width and height in millimetres. The height includes the legs, so a 720 mm kitchen base unit on 100 mm legs is dimensioned 820.
Names and thumbnails follow the UI language: in the English UI you see English names and the captions CLOSED, INSIDE and PLAN.
Options
| Option | What it does | Default | Values |
|---|---|---|---|
| Cabinet templates | Panel with the search, My templates and the categories | closed | – |
| Search field (magnifier) | Shows only templates whose name contains the text you typed | empty (reads Search) | any text; upper and lower case make no difference |
| My templates | Templates you saved yourself, sorted by category | open | – |
| Save as template | Saves the selected cabinet with what goes with it | – | grey until a cabinet is selected, or when you are not in Object Mode |
| Folder icon | Open the templates folder: opens the folder with your templates | – | – |
| Pencil icon on a card | Rename template (My templates only) | – | – |
| Bin icon on a card | Delete template and its thumbnails (My templates only) | – | asks for confirmation |
| Categories | Cards of the built-in templates | closed | 8 categories; an empty one is not shown |
| Import and export | The Import cabinet and Export cabinet buttons | closed | .json files |
Categories
| Category in the UI | Templates | Folder on disk |
|---|---|---|
| Kitchen lower | 30 | kitchen_lower |
| Kitchen upper | 13 | kitchen_upper |
| Wardrobe | 7 | wardrobe |
| Bathroom | 7 | bathroom |
| Living room | 7 | tv_sets |
| Bedroom | 6 | night_stand |
| Hallway | 5 | hallway |
| Office | 5 | office |
80 templates in total. Within a category the cards are sorted by the English file name, so in the Croatian UI the names are not necessarily in alphabetical order. You need the folder on disk only when you move My templates files yourself (see Where they are saved). The list of all templates with their measurements is at the end of the chapter: List of templates.
Search
The fastest way to a template is the search.
- Click the search field below the Cabinet templates title.
- Type part of the name, for example
sink. - Press Enter.
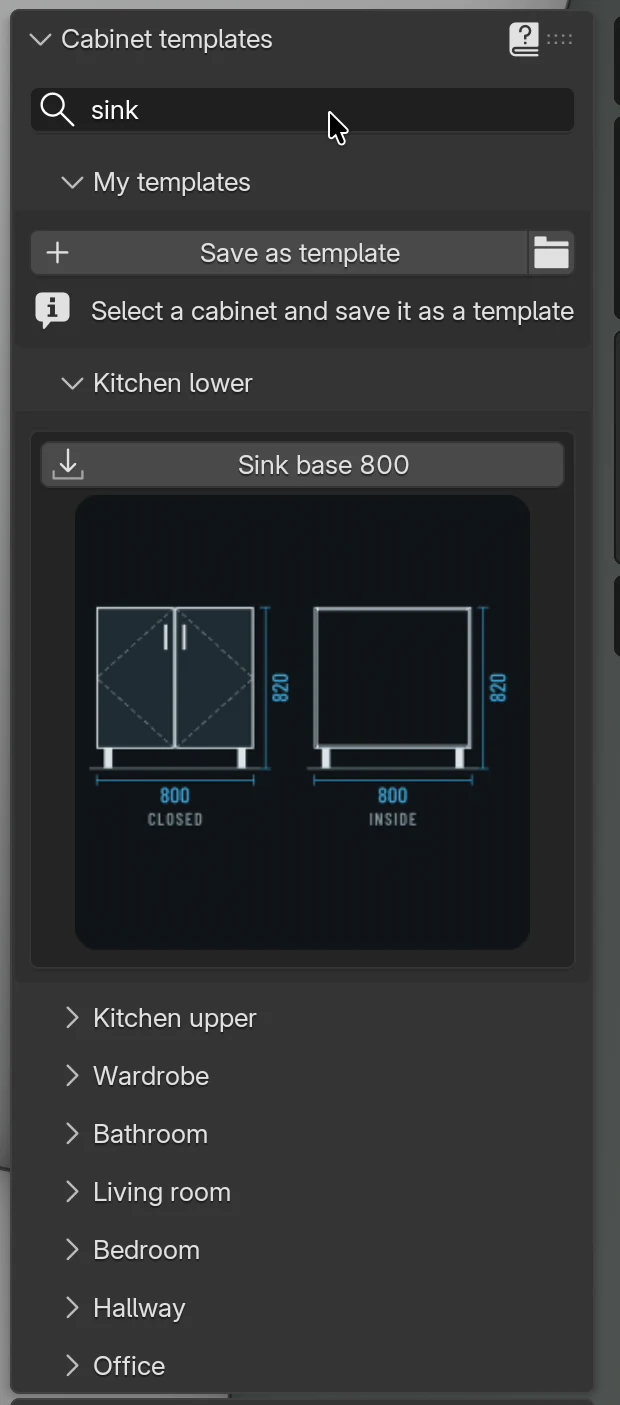
Search rules:
- It looks for part of the name, anywhere in the name:
doorfinds both Single door and Oven high - single door. - For built-in templates the search also checks the English file name, so
sinkfinds Sink base 800 in the Croatian UI too. - For My templates it checks only the name you typed.
- The search filters the cards but doesn't open the categories. You see the result when you open the category the template is in.
- The text you typed stays in the field and is saved with the project. While there is something in it, both the built-in templates and My templates are filtered. For the full list, delete the text and press Enter.
Tip
The same templates are also in the Add menu in the header (and Shift+A → Easy Form Studio): below the tools there is a submenu for each category, and My templates once you have at least one. The menu has no thumbnails, but it doesn't need the sidebar.
Placing a template
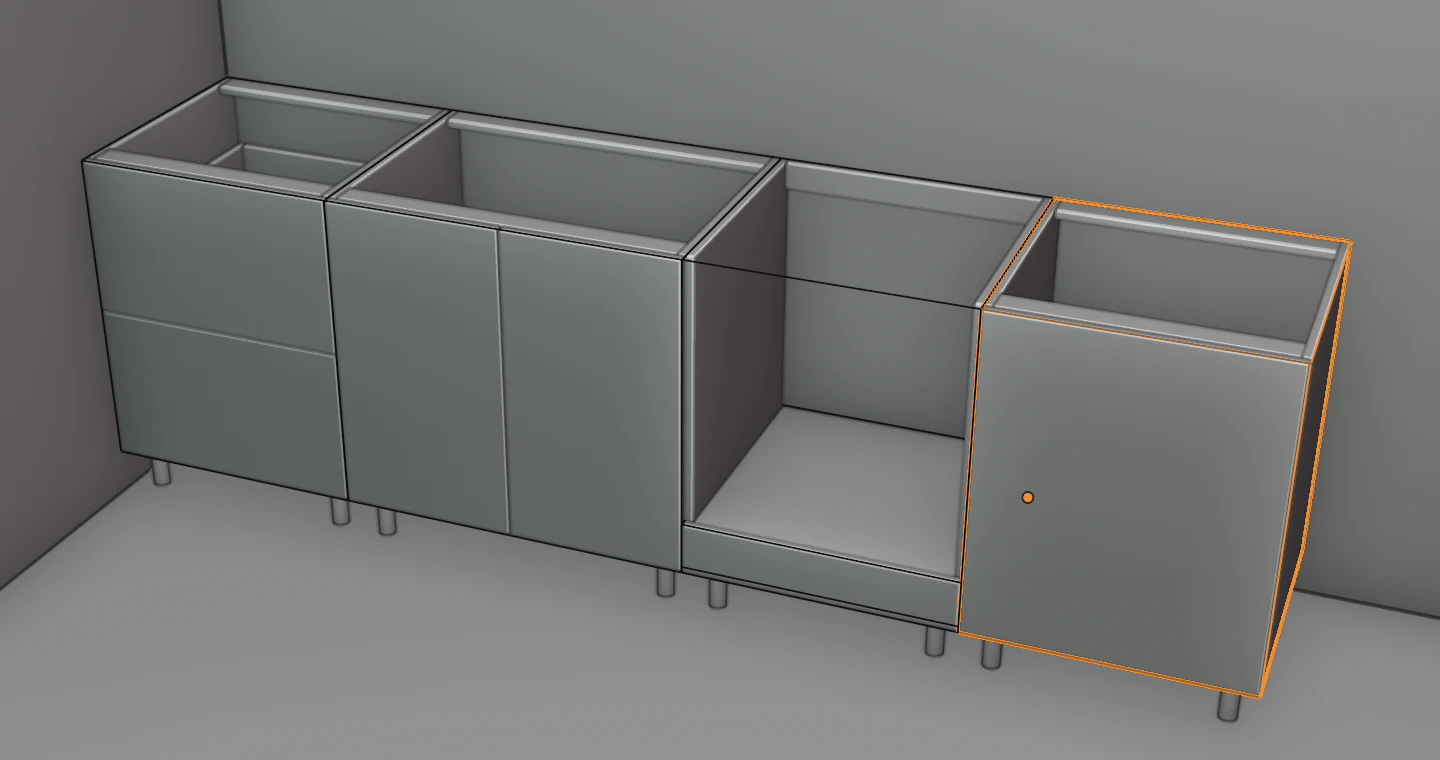
This is how the run in the video is put together: two drawers in the corner, then the sink, the oven and a cabinet with a single door.
- Make sure nothing is selected: click on empty space.
-
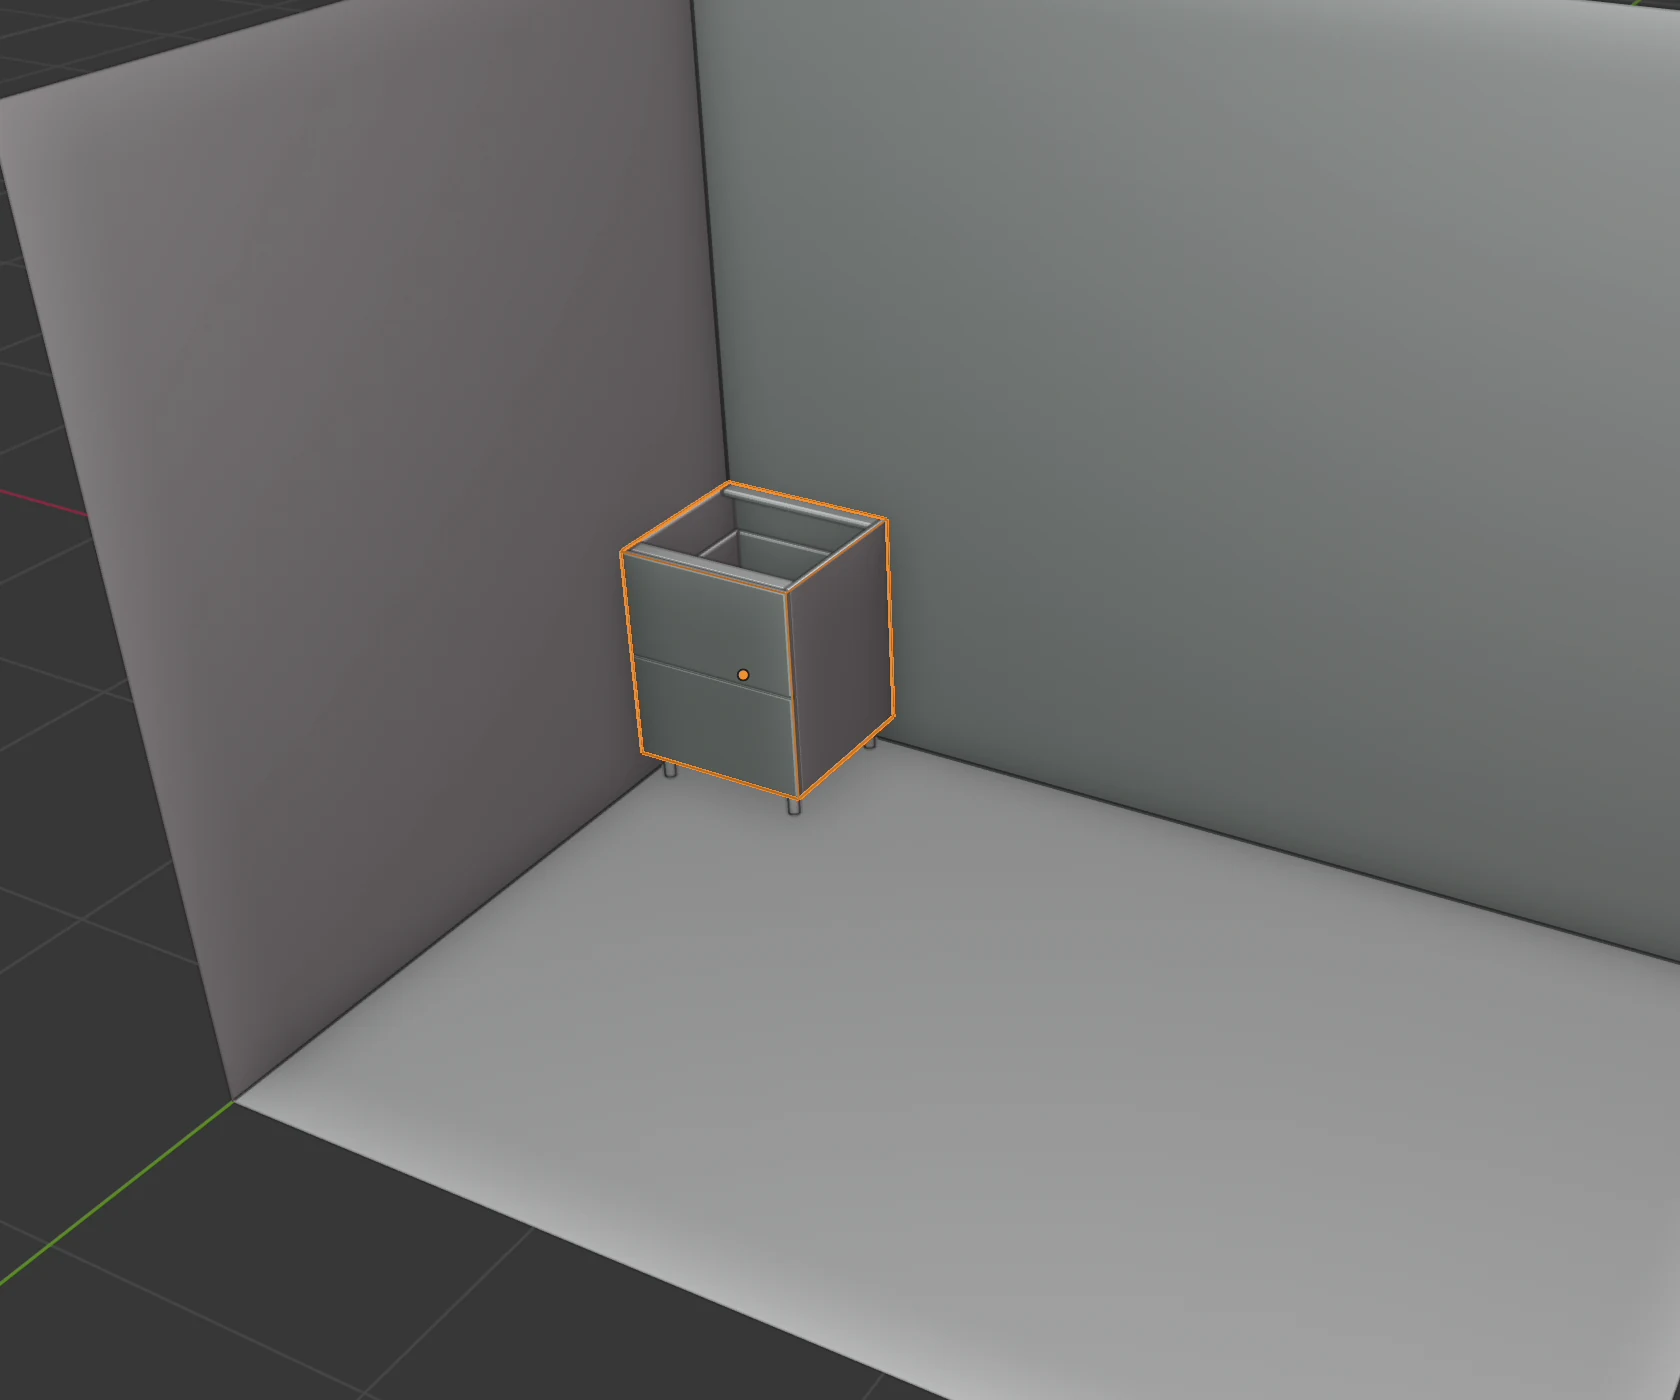
In the Kitchen lower category, click 2 Drawers. The cabinet goes into the corner of the room and stays selected.
-
Type
sinkin the search, press Enter and click Sink base 800. While the previous cabinet is selected, the new one goes straight to its right. - Search for
ovenand click Oven, then search forsingle doorand click Single door. Each new cabinet stays selected, so the next one goes next to it.
Where a template goes
EFS chooses the place by what is selected and by the direction you are looking at the scene from. The view direction is shown at the right end of the EFS tool header (000°, 090°, 180° or 270°). Positioning options is the first drop-down button after the size fields in the header; the same options are also in the Scene properties panel in the EFS tab.
| Situation | Where the template goes |
|---|---|
| A cabinet is selected (click any of its boards), option Forward alignment | Against the right side of the selected cabinet, with the backs in line and the same rotation. If the right side is taken, it goes to the left. If both sides are taken, it is placed as if nothing were selected. |
| Nothing selected, view 000° | At the right end of the existing run, against the back wall. Base units line up with base units, wall units with wall units. The first base unit and the first wall unit go to the scene origin, which is the back left corner of the room. |
| Nothing selected, view 270° | The cabinet turns with its back to the left wall and goes right in front of the cabinet that stands furthest forward in the scene (base units look at base units, wall units at wall units). That way the run along the left wall builds up from the back corner forwards. If the scene has no cabinet of the same kind yet, it goes behind the back wall, outside the room: move it with 2. |
| Nothing selected, view 090° or 180° | The cabinet turns towards the view and follows the mouse. Move it and click to place it. |
| Sliding on X axis, Sliding on Y axis or Sliding on X and Y axis is chosen in Positioning options | The template doesn't go next to the selected cabinet. With view 000° and 270° it slides along the chosen axis until you place it with a click. |
| Rotate cabinet based on view rotation on creation is off in the add-on preferences | The template doesn't turn and always follows the mouse until you place it with a click. |
While the cabinet follows the mouse, Esc cancels the move: the cabinet stays where EFS created it.
At what height
- Base and tall units stand on their own legs: kitchen units and wardrobes on 100 mm, bedroom on 150 mm, some of the office templates and the bench on 50 mm. Templates without legs stand on the floor.
- Kitchen upper templates come at the height from the Upper elements height field (EFS tab, Scene properties panel, default 1430 mm).
- Wall-hung templates from the other categories carry their own mounting height: the vanity bottom at 350 mm, bathroom wall cabinets at 1150 mm, the floating TV unit at 250 mm, the wall unit with a flap at 1500 mm. The exact heights are in the list of templates.
- When a template goes next to a selected cabinet, it keeps its own height. That is why a wall unit template next to a selected base unit goes beside it at the wall unit height, not above it.
Without a room
A room is not required. Without one, the first cabinet goes to the scene origin, where the red and green axes cross, and the other rules apply the same way. If you add a room later, its back left corner is at the same point.
What a template brings with it
- The name from the template, in the UI language. If a cabinet with that name already exists, the new one gets the suffix
- 2,- 3… A template made of several carcasses has one main carcass with the template's name, and the others get(2),(3)… (e.g. Oven and Oven (2) for the drawer below the oven). - Hardware and joints from the project. Built-in templates have no hinges, drawer slides, handles or joints of their own; they get the ones from the Project hardware panel (see Project hardware).
- Material groups: the fronts are in group F 1, and on wall units in group F 2. Side panels, top and bottom boards, back and shelves have the group from the template.
- Edge tape: side panels, top and bottom boards, back and shelves have the edge tape from the template. Fronts, drawers and cross boards get edge tape like a new cabinet: from My settings, and until you have saved those, the default edge tape (fronts 2 mm, everything else 0.4 mm).
- No decor. A template doesn't carry a decor. The boards of the new cabinet come in white: with the W908 Basic white decor if the project already has it, otherwise with the default white material (Default white). A decor you have already assigned to a group doesn't pass to them by itself, so after adding templates repeat the assignment in Material assignment (see Decors, edge tape and materials).
Watch out
A template placed next to a selected cabinet is not related to it, not even when Relate a new cabinet to the selected one is on in the add-on preferences (that setting applies only to Add → Cabinet). If you move the neighbour, the template stays where it is.
A template is an ordinary cabinet
Once a template is in the scene, it is an ordinary EFS cabinet. You change everything on it as on a cabinet from Add → Cabinet:
- the measurements in the header (W, D, H): the boards rearrange themselves;
- fronts (F), drawers (D), legs (L), rotation (R) and everything in the EFS - Cabinet tab (see How a cabinet is built);
- the position with 1, 2 and 3 (move along the X, Y or Z axis).
Templates made of several carcasses (Oven, Pantry 600, Wardrobe, 3 doors…) are built from related carcasses. When you move the main carcass, the related ones go with it. The drawer in Door and drawer and the lower door of Pantry 600 are a carcass inside the main carcass. When you change their height, they stay against the bottom or top of the main carcass, and the front of the main carcass gets shorter or longer.
When you delete the main carcass (X), the carcasses related to it are deleted with it. The worktop and kickboard that came with the template stay in the scene; delete them separately.
Changes in the scene don't change the template. The next time you click the same card, you get it as it was. If you want to reuse the changed cabinet, save it as your own template.
Tip
If the template went to the wrong place, press Ctrl+Z and place it again with a different selection, or move it with 1 and 2.
My templates
You can save any cabinet you build as your own template. The worktop, kickboard and fillers you select together with the cabinet are saved with it.
Saving with a worktop
- Click the sink cabinet.
- In the header, click Add → Worktop over selected. The worktop is now selected.
-
Shift-click the sink cabinet. The worktop and the cabinet are selected.
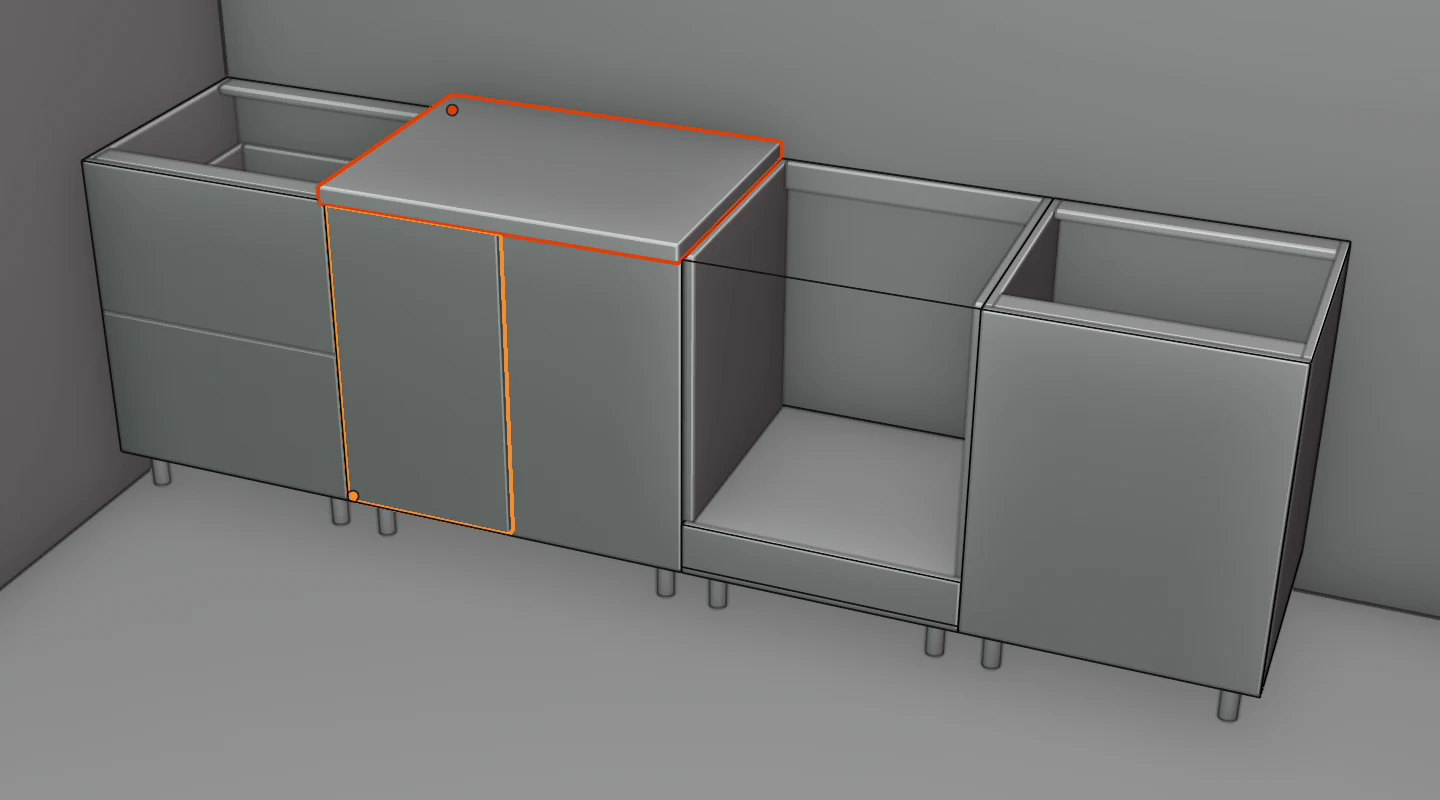
-
In the My templates panel, click Save as template. A dialog opens.
- In the Name field, type a name, e.g.
Sink 800 with worktop, and press Enter. - Check Category. EFS suggests Kitchen lower, and Kitchen upper for a wall unit. For a wardrobe, bathroom and the rest, choose the right category.
- Click OK.
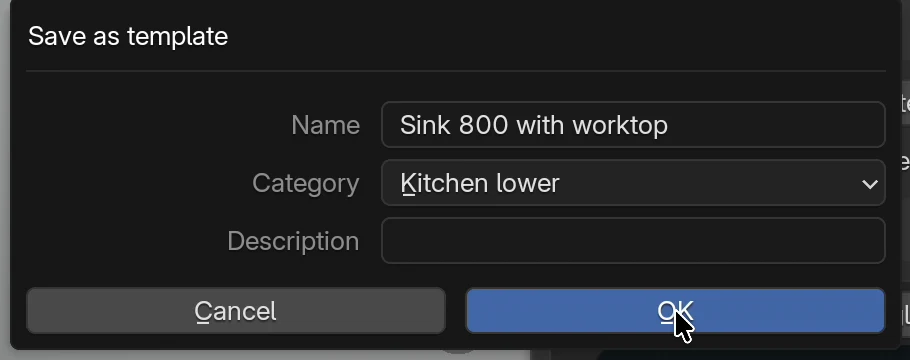
EFS reports Saved in My templates: and the file name. The template is now in My templates, at the top of the Cabinet templates panel, under the name of its category.
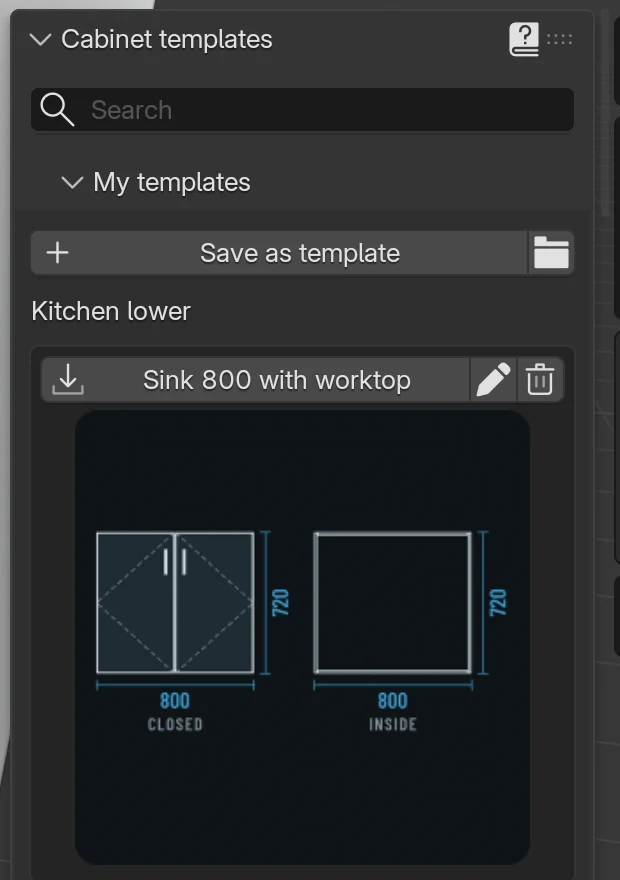
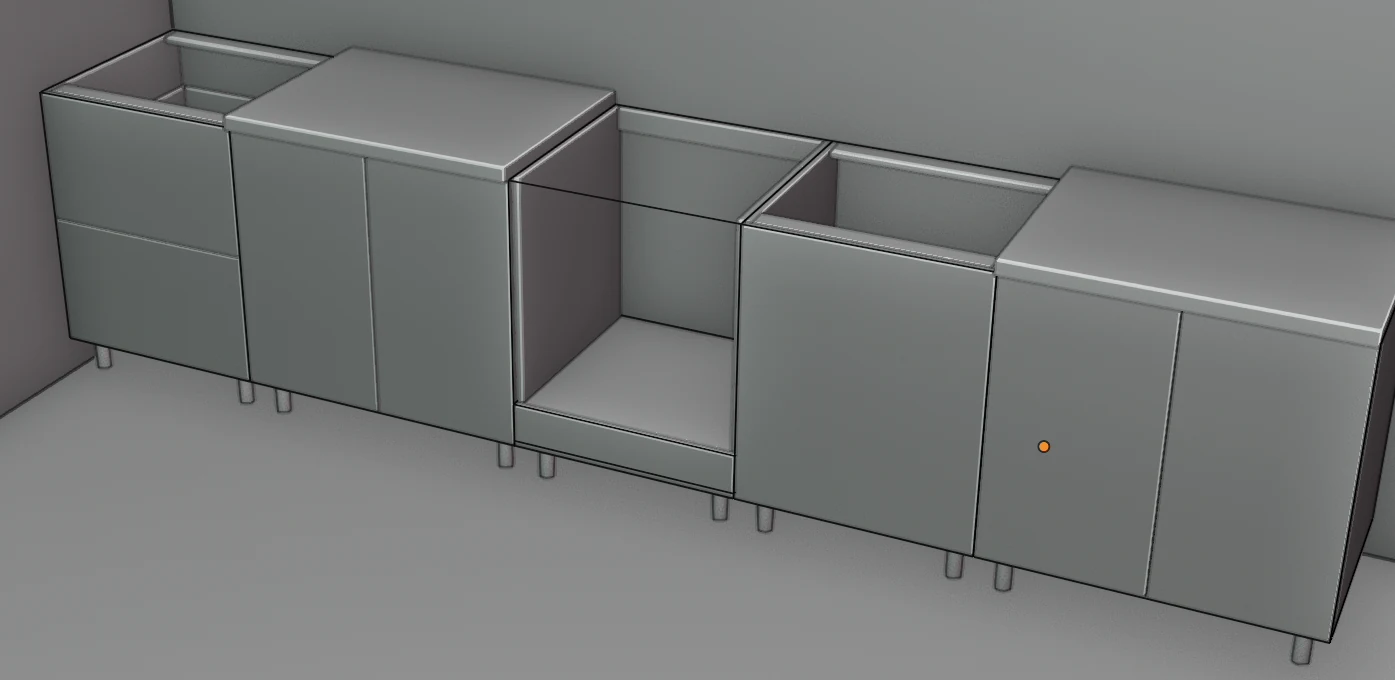
You place it like the built-in ones: select the cabinet it goes next to and click the card. The worktop comes together with the cabinet.
Save as template is also in the right-click menu on a cabinet (with the EFS tool) and in Blender's right-click menu on an object. From there the same window opens as from the panel, with the Name, Category and Description fields. The name is filled in with the cabinet's name, and the category is Kitchen upper for a wall unit, otherwise Kitchen lower.
The Save as template dialog
| Option | What it does | Default | Values |
|---|---|---|---|
| Name | Name of the card in My templates and the cabinet's name when you place it | name of the selected cabinet | any text; an empty field means the cabinet's name |
| Category | The category the template is listed under in My templates | Kitchen upper for a wall unit, otherwise Kitchen lower | the 8 categories from the table above |
| Description | A note saved in the template file | empty | any text; the card doesn't show it |
What goes into a template
| What | Goes into the template? |
|---|---|
| The selected cabinet | yes; if several cabinets are selected, only one goes in, so select only the cabinet you are saving |
| Carcasses directly related to it (left, right, above, below) | yes, by themselves |
| Carcasses related only through a neighbour | no |
| Fillers and end panels added with Add to the cabinet, sliding doors | yes, by themselves: they are tied to the cabinet |
| Worktop, Kickboard over selected, Cornice over selected, a filler from Fill the gap, a free board | only if selected together with the cabinet |
| The cabinet's hardware and joints | yes: your template remembers its own hinges, drawer slides, handles and joints |
| Construction: measurements, thicknesses, back, top and bottom, fronts, drawers, shelves, legs | yes |
| Edge tape and material group of the side panels, top and bottom boards, back and shelves | yes |
| Edge tape and material group of fronts, drawers and cross boards | no: when placed they get the edge tape from My settings (or the default), and the fronts get group F 1, on wall units F 2 |
| Decor | no |
| Height of a wall unit | yes: a wall unit from My templates comes at the height it was at when you saved it |
Free boards remember their position relative to the cabinet. When you place the template somewhere else, the worktop and kickboard come to the same place next to the cabinet and move with it while you place it.
Watch out
Every selected free board goes into the template, including one that is not next to the cabinet. The worktop goes in whole: if it runs over three cabinets and you save only one, the template's worktop is too long. Before saving, select only the cabinet and the boards that belong to it.
Note
For a cabinet made of several carcasses, select the main carcass, the one that holds the relations. For a cabinet from a template, that is the carcass whose name has no number in brackets. If you select a related carcass (e.g. Oven (2)), only that one is saved.
The thumbnail of your template is created by itself when you save it, in the same style as the built-in ones (closed and inside, with measurements). It draws only the carcasses: it doesn't draw the worktop, kickboard or legs, so the height dimension is without the legs.
Renaming and deleting
- Rename: click the pencil icon on the card, type the new name and click OK. The file is renamed, and the thumbnails follow it.
- Delete: click the bin icon and confirm. The template file and all its thumbnails are deleted.
You don't change the category of a saved template in the dialog. Save the cabinet again in another category and delete the old one, or move the files to another folder (see below).
Watch out
You can't undo deleting and renaming with Ctrl+Z: they change files on disk, not the project.
Tip
Saving under the same name in the same category doesn't overwrite the old template; it makes a new one (the file gets a number, e.g. Sink 800 with worktop 2). Both cards show the same name. When you want to replace a template, first delete the old one, then save the new one.
Where they are saved
My templates are not in the project but in the add-on's user folder on your computer. They apply to all projects on that computer. The easiest way to open the folder is the folder icon next to Save as template.
| Program | Folder |
|---|---|
| EasyFormStudio app on a Mac | ~/Library/Application Support/EasyFormStudio/5.2/extensions/.user/user_default/efs/templates/ |
| EasyFormStudio app on Windows | %APPDATA%\Blender Foundation\Blender\5.2\extensions\.user\user_default\efs\templates\ |
| Add-on in Blender | extensions/.user/user_default/efs/templates/ in Blender's user folder |
The templates folder has a subfolder for each category (names from the Categories table). Each template is a .json file and a thumbnail for each of the eight interface languages:
Name.json: the cabinet, the related carcasses and the free boards;Name.png: the thumbnail in English;Name.hr.png,Name.de.png,Name.pl.png,Name.it.png,Name.fr.png,Name.cs.png,Name.es.png: the thumbnails in Croatian, German, Polish, Italian, French, Czech and Spanish.
Characters the file system doesn't accept (\ / : * ? " < > |) are replaced by a space in the file name. The card keeps the name as you typed it.
Note
The .user folder starts with a dot, so Finder doesn't show it. That is why you open it with the folder icon in the panel.
Moving to another computer
- On the first computer, click the folder icon in My templates.
- Copy the category subfolders with all their files (
.jsonand.png), e.g. to a USB stick or to the cloud. - On the second computer, save at least one template or click the folder icon: EFS creates the
templatesfolder. - Paste the subfolders into that folder. If a category subfolder already exists, copy the files into it.
The templates appear in My templates as soon as the panel refreshes. The transfer also works between Mac and Windows.
For advanced users
- EFS reads only
.jsonfiles from the category subfolders. A file directly in thetemplatesfolder or in a subfolder with another name is not shown. - A cabinet exported with the Export cabinet button (see below) can be dropped into a category subfolder. It is shown under its file name, without a thumbnail.
- You move a template to another category by moving all its files (
.jsonand.png) to another subfolder.
Updating and uninstalling
Updating EFS replaces the add-on folder, and My templates are outside it. After an update they stay where they were, as do My settings.
Watch out
When you uninstall the add-on in the preferences (Uninstall in the add-on list), its user folder is deleted too: My templates, My settings and your price list. The same applies in the EasyFormStudio app and in Blender. Before uninstalling, copy the efs folder from extensions/.user/user_default/ to a safe place.
Importing and exporting a cabinet (JSON)
The Import and export panel in the EFS - Templates tab saves a single cabinet to a file and brings it back from it. That way you send a cabinet to a colleague or move it from one project to another without My templates.
Export:
- Make sure the cabinet itself is active, not one of its boards. Right after placing a template, the cabinet is active. Otherwise click the cabinet's name in Cabinet elements in the right-hand column: clicking a board in the 3D view selects only that board.
- Open the Import and export panel and click Export cabinet.
- In the file browser, choose a folder. The suggested name is the cabinet's name with the
.jsonextension. - Confirm with the Export to JSON button.
Import:
- Select the cabinet the new one should go next to, or nothing.
- Click Import cabinet, choose a
.jsonfile and confirm with the Import from JSON button.
The imported cabinet is placed by the same rules as a template (see Where a template goes).
| Option | What it does | When it is grey |
|---|---|---|
| Import cabinet | Places a cabinet from a .json file in the scene |
never |
| Export cabinet | Saves the active cabinet to a .json file |
when the active object is not the cabinet itself, e.g. after clicking a board in the 3D view |
The file holds the same as a template in My templates (the cabinet, directly related carcasses, attached fillers and end panels, selected free boards, hardware), but without a thumbnail and without a category.
Template or My settings?
Both save work, but they work differently. My settings are described in the chapter Working faster.
| Template | My settings | |
|---|---|---|
| What it is | A finished cabinet: carcasses, fronts, drawers, shelves, plus worktop, kickboard, fillers | The way your workshop builds: construction and edge tape, plus project hardware, quote, export and wall unit height |
| How many | As many as you like, by category | One set |
| When it applies | When you click the template's card | On every new cabinet from Add → Cabinet (C) and on every new project |
| Where it is saved | templates/<category>/ |
defaults.json in the same user folder |
My settings don't change a template's construction: measurements, thicknesses, back, top, bottom and legs stay as they are in the template. Two things do come from My settings:
- edge tape of fronts, drawers and cross boards (the carcass and shelves keep the edge tape from the template);
- hardware of built-in templates: they take it from Project hardware, and the hardware of a new project comes from My settings.
List of templates
The measurements are of the carcass, without legs: width × depth × height in mm. The Mounting column says what the cabinet stands on, or at what height its bottom is when it hangs. The thumbnails are the same as in the program; click a thumbnail for a larger view.
Kitchen lower (30)
All are 580 mm deep, on 100 mm legs. Most have the back over the back edges and, at the top, a front and a back cross board instead of a full top. Templates ending in - gola have a gola profile instead of handles.
| Thumbnail | Name | W × D × H | What it has |
|---|---|---|---|
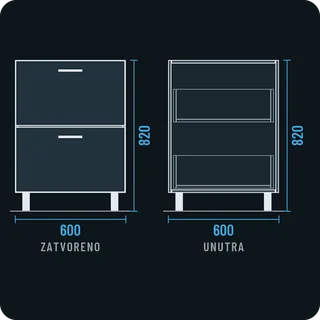 |
2 Drawers | 600 × 580 × 720 | two equal drawers |
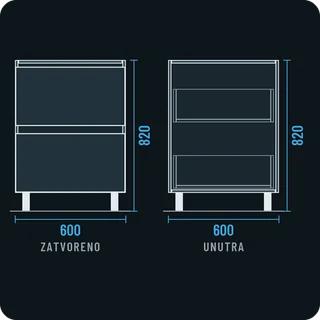 |
2 Drawers - gola | 600 × 580 × 720 | two equal drawers, gola |
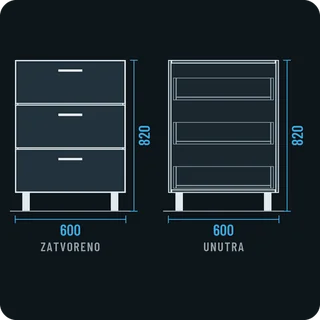 |
3 Drawers | 600 × 580 × 720 | three equal drawers |
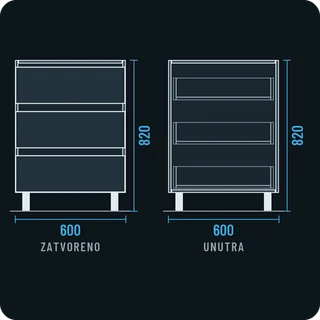 |
3 Drawers - gola | 600 × 580 × 720 | three equal drawers, gola |
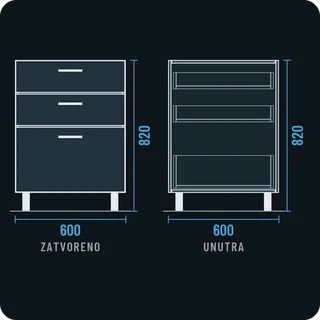 |
3 Drawers 2 1 1 | 600 × 580 × 720 | three drawers, the bottom one double height |
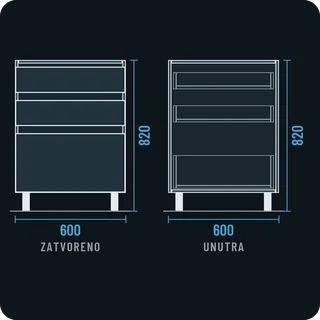 |
3 Drawers 2 1 1 - gola | 600 × 580 × 720 | the same, gola |
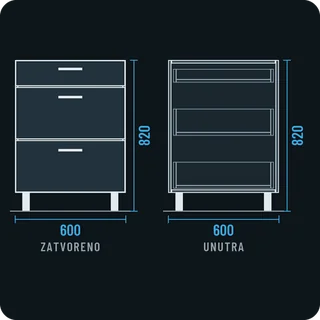 |
3 Drawers 2 2 1 | 600 × 580 × 720 | two tall drawers and a low one at the top |
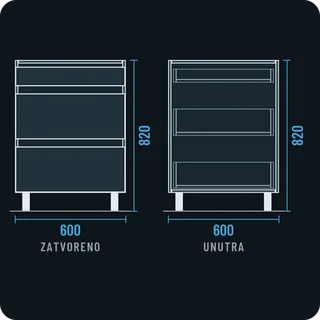 |
3 Drawers 2 2 1 - gola | 600 × 580 × 720 | the same, gola |
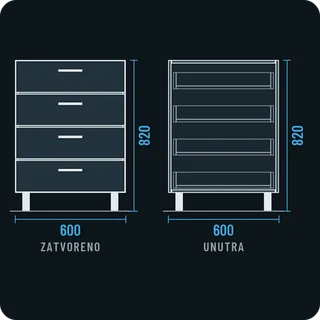 |
4 Drawers | 600 × 580 × 720 | four equal drawers |
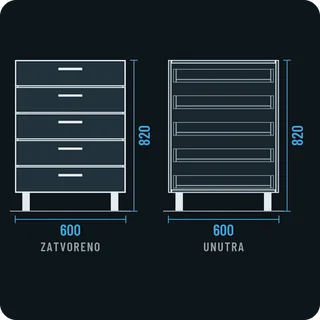 |
5 Drawers | 600 × 580 × 720 | five equal drawers |
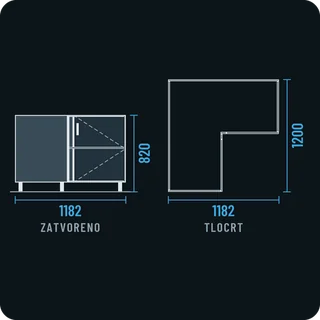 |
Corner element | 1182 × 1200 × 720 | L-shaped corner cabinet, doors 556 and 556 mm; the thumbnail shows the plan |
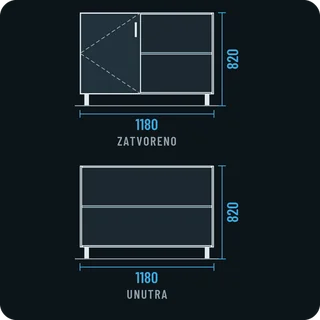 |
Corner left | 1180 × 580 × 720 | blind corner: door on the left, one shelf; the corner needs a 60 mm filler |
 |
Corner right | 600 × 580 × 720 | door on the right, no left side panel, one shelf; the corner needs a 60 mm filler |
 |
Door and drawer | 600 × 580 × 720 | drawer at the top, door below (two carcasses) |
 |
Door and drawer - gola | 600 × 580 × 720 | the same, gola |
 |
Double door | 800 × 580 × 720 | two doors, one shelf |
 |
Double door - gola | 800 × 580 × 720 | the same, gola |
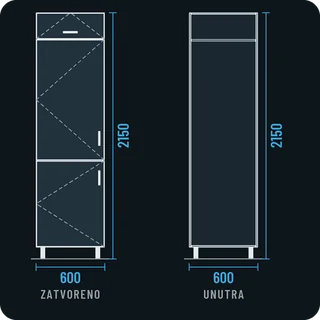 |
Fridge | 600 × 580 × 2050 | tall unit for a built-in fridge: two doors and a compartment flap at the top (three carcasses) |
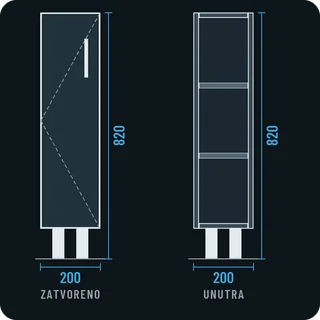 |
Narrow base 200 | 200 × 580 × 720 | door, two shelves; for spices or chopping boards |
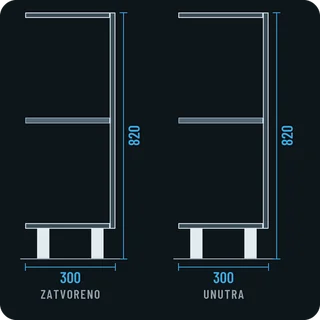 |
Open shelves left edge | 300 × 580 × 720 | open, no back and no left side panel, one shelf; for the left end of the run |
 |
Open shelves right edge | 300 × 580 × 720 | the same, for the right end of the run |
 |
Oven | 600 × 580 × 720 | niche for a built-in oven and a low drawer below (two carcasses) |
 |
Oven high - drawers | 600 × 580 × 2050 | three drawers at the bottom, a 600 mm oven niche above them, a door at the top (two carcasses) |
 |
Oven high - single door | 600 × 580 × 2050 | door at the bottom, 600 mm niche, door at the top |
 |
Oven high 3 Drawers 2 2 1 - gola | 600 × 580 × 2050 | drawers 2 2 1 at the bottom, 600 mm niche, door at the top; gola |
 |
Oven mid | 600 × 580 × 1330 | three drawers, above them a 600 mm niche for an oven at eye level; top in line with the bottom of the wall units |
 |
Pantry 600 | 600 × 580 × 2050 | two doors, one above the other, five shelves; the lower door in line with the base unit fronts |
 |
Single door | 600 × 580 × 720 | door, one shelf |
 |
Single door - gola | 600 × 580 × 720 | the same, gola |
 |
Sink base 800 | 800 × 580 × 720 | two doors, no back because of the plumbing, cross boards instead of a top; you can change the width to 900–1200 |
Kitchen upper (13)
All are 350 mm deep and hang at the height from the Upper elements height field (default 1430 mm).
| Thumbnail | Name | W × D × H | What it has |
|---|---|---|---|
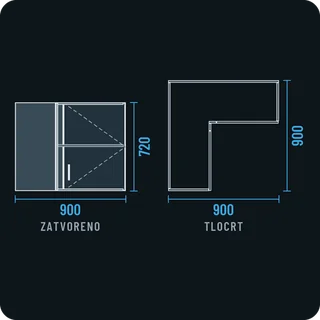 |
Corner element | 900 × 900 × 720 | L-shaped wall corner cabinet; the thumbnail shows the plan |
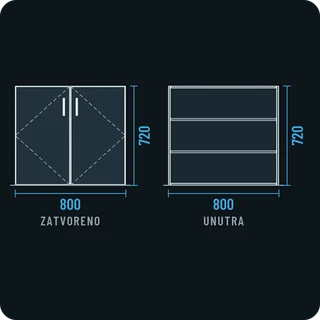 |
Double door | 800 × 350 × 720 | two doors, two shelves |
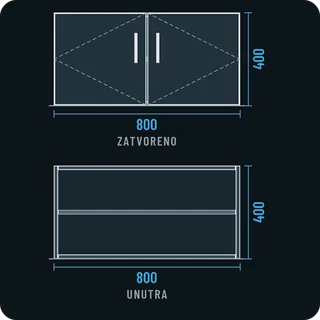 |
Double door short | 800 × 350 × 400 | two doors, one shelf |
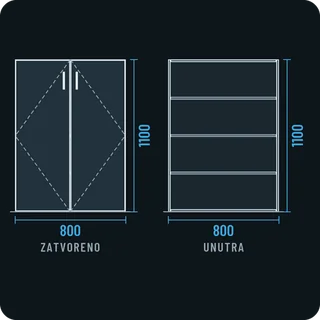 |
Double door tall | 800 × 350 × 1100 | two doors, three shelves |
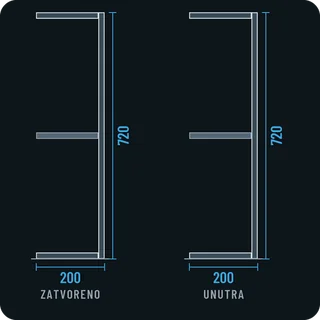 |
Open top shelves left edge | 200 × 350 × 720 | open, no back and no left side panel, one shelf |
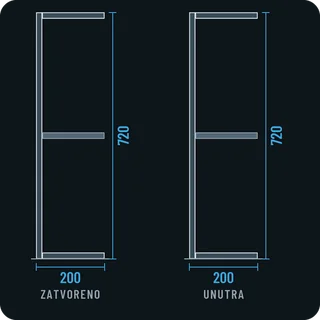 |
Open top shelves right edge | 200 × 350 × 720 | the same, for the right end of the run |
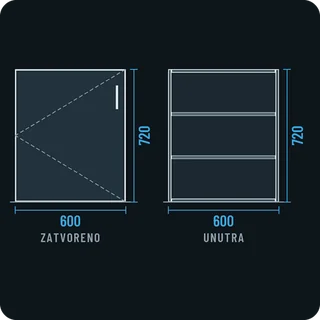 |
Single door | 600 × 350 × 720 | door, two shelves |
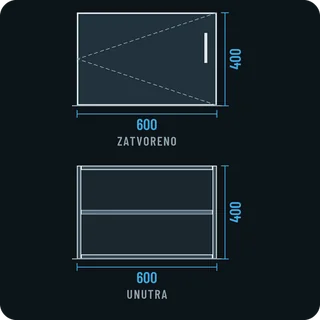 |
Single door short | 600 × 350 × 400 | door, one shelf |
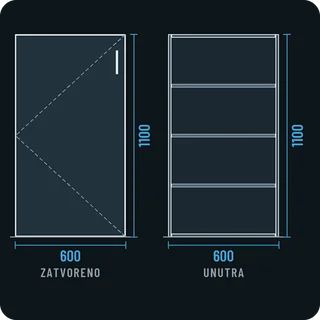 |
Single door tall | 600 × 350 × 1100 | door, three shelves |
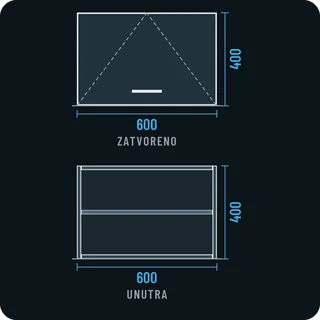 |
Single top door short | 600 × 350 × 400 | flap hinged at the top, one shelf |
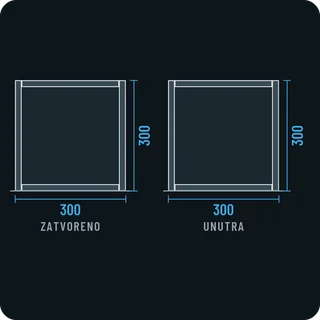 |
Top shelf | 300 × 350 × 300 | open box |
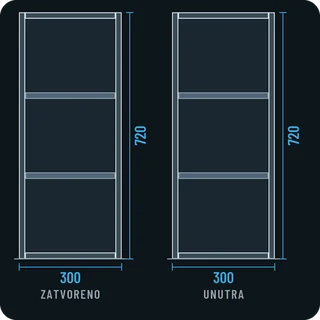 |
Top shelf vertical narrow | 300 × 350 × 720 | open, two shelves |
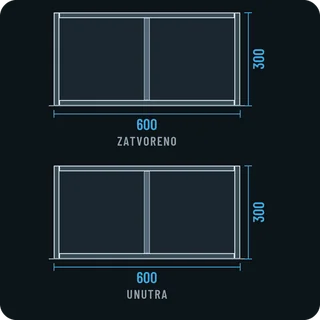 |
Top shelf wide | 600 × 350 × 300 | open, vertical divider in the middle |
Wardrobe (7)
All stand on 100 mm square legs. More about wardrobes in the chapter A wardrobe with compartments and a rail.
| Thumbnail | Name | W × D × H | What it has |
|---|---|---|---|
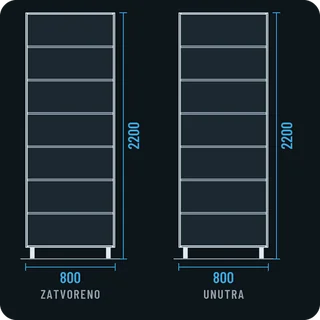 |
Open wardrobe shelving | 800 × 400 × 2100 | no fronts, six shelves; for a walk-in wardrobe |
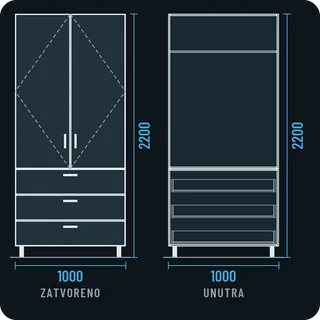 |
Wardrobe with drawers | 1000 × 580 × 2100 | at the bottom a 700 mm carcass with three drawers, at the top a 1400 mm carcass with two doors, a shelf and a hanging rail |
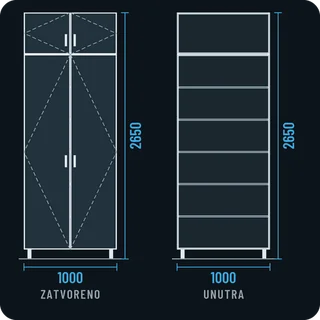 |
Wardrobe with top box | 1000 × 580 × 2550 | two doors and five shelves, above them a 450 mm top box with two doors |
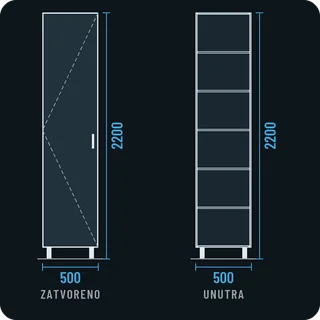 |
Wardrobe, 1 door | 500 × 580 × 2100 | door, five shelves |
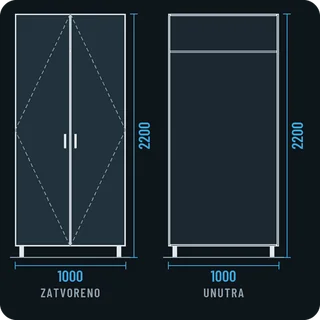 |
Wardrobe, 2 doors, hanging rail | 1000 × 580 × 2100 | two doors, a hat shelf and a hanging rail |
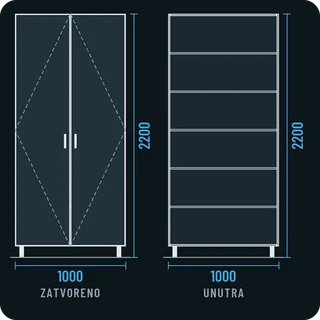 |
Wardrobe, 2 doors, shelves | 1000 × 580 × 2100 | two doors, five shelves |
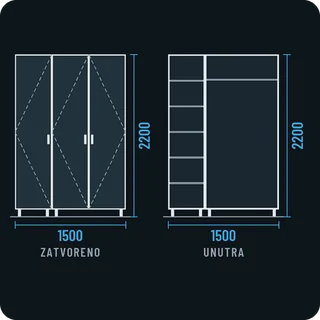 |
Wardrobe, 3 doors | 1500 × 580 × 2100 | two related carcasses: 500 mm with a door and five shelves, 1000 mm with two doors, a shelf and a rail; a 36 mm double side panel in the middle |
Bathroom (7)
More about the bathroom in the chapter Bathroom: siphon and pipes.
| Thumbnail | Name | W × D × H | Mounting | What it has |
|---|---|---|---|---|
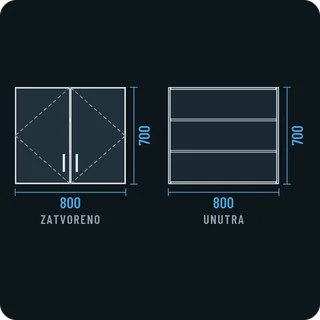 |
Mirror cabinet 800 | 800 × 150 × 700 | wall-hung, bottom at 1150 | two doors, two shelves; mirror centre at 1500 mm. EFS doesn't draw the mirror: the doors are plain boards. |
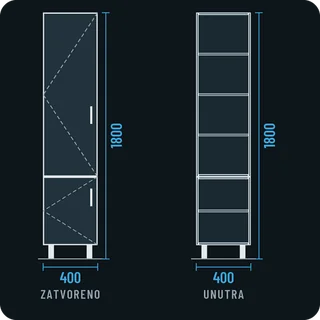 |
Tall bathroom cabinet | 400 × 350 × 1700 | legs 100 | at the bottom a 500 mm carcass with a door, at the top a 1200 mm carcass with a door and three shelves |
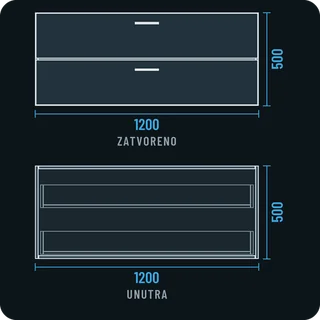 |
Vanity 1200, 2 drawers | 1200 × 460 × 500 | wall-hung, bottom at 350 | two drawers; for a double basin |
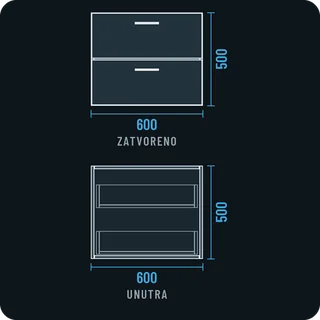 |
Vanity 600, 2 drawers | 600 × 460 × 500 | wall-hung, bottom at 350 | two drawers; top edge at 850 mm |
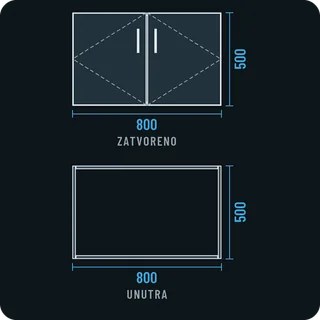 |
Vanity 800, 2 doors | 800 × 460 × 500 | wall-hung, bottom at 350 | two doors, no back because of the drain |
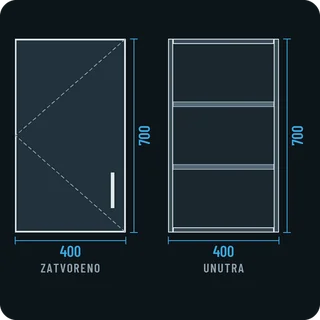 |
Wall cabinet 400 | 400 × 200 × 700 | wall-hung, bottom at 1150 | door, two shelves |
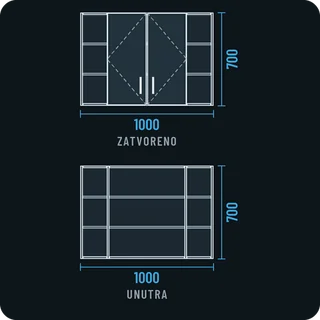 |
Wall cabinet with side shelves | 1000 × 200 × 700 | wall-hung, bottom at 1150 | a 600 mm cabinet with two doors and 200 mm open shelves on the left and right (three carcasses) |
Living room (7)
More in the chapter Hallway and living room from templates.
| Thumbnail | Name | W × D × H | Mounting | What it has |
|---|---|---|---|---|
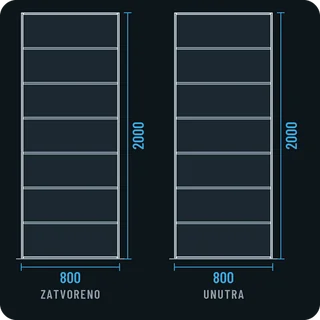 |
Bookcase | 800 × 300 × 2000 | on the floor | open, six shelves; fix it to the wall |
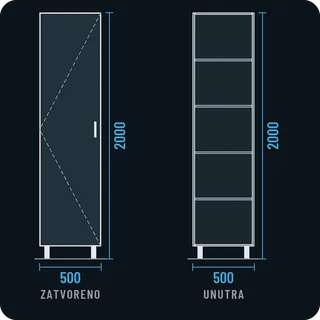 |
Display cabinet | 500 × 350 × 1900 | legs 100 | door, four shelves. EFS doesn't draw the glass: the door is a plain board. |
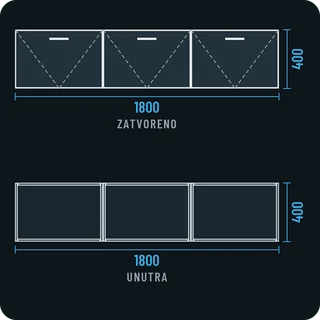 |
Floating TV unit, 3 flaps | 1800 × 400 × 400 | wall-hung, bottom at 250 | three related 600 mm carcasses, the flaps open downwards |
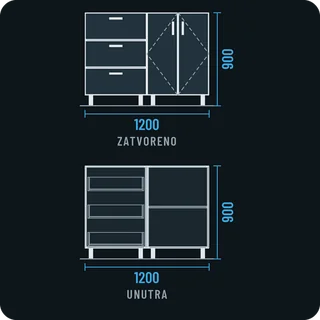 |
Sideboard 1200 | 1200 × 450 × 800 | legs 100 | two 600 mm carcasses: three drawers, and two doors with a shelf |
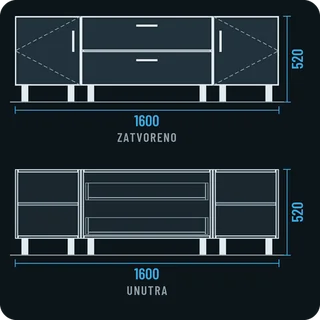 |
TV unit with drawers | 1600 × 500 × 420 | legs 100 | 800 mm with two drawers in the middle, 400 mm with a door on the left and right |
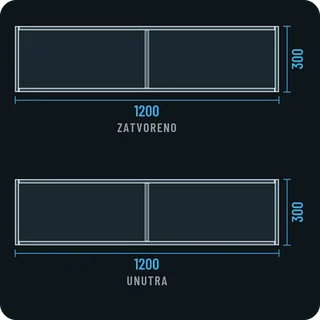 |
Wall shelf | 1200 × 250 × 300 | wall-hung, bottom at 1200 | open, divider in the middle |
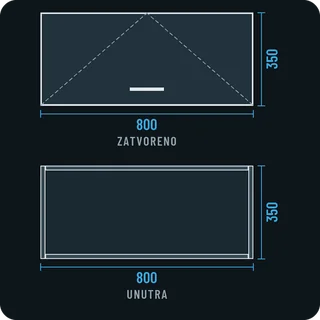 |
Wall unit with lift-up flap | 800 × 350 × 350 | wall-hung, bottom at 1500 | flap hinged at the top |
Bedroom (6)
| Thumbnail | Name | W × D × H | Mounting | What it has |
|---|---|---|---|---|
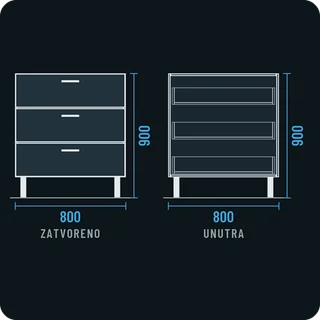 |
Chest, 3 drawers | 800 × 450 × 750 | legs 150 | three drawers |
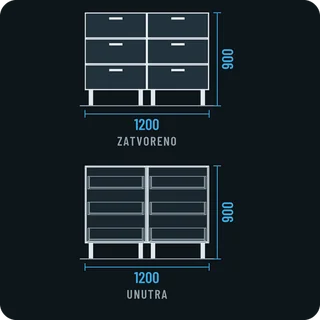 |
Dresser, 6 drawers | 1200 × 450 × 750 | legs 150 | two 600 mm carcasses, each with three drawers |
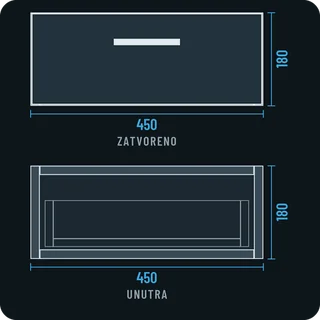 |
Floating nightstand | 450 × 350 × 180 | wall-hung, bottom at 400 | one drawer |
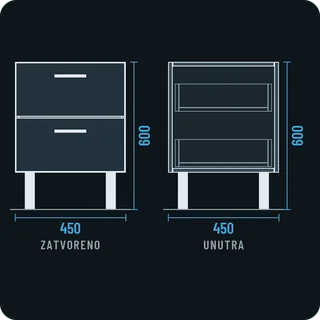 |
Nightstand, 2 drawers | 450 × 400 × 450 | legs 150 | two drawers; 600 mm overall, level with the mattress |
 |
Nightstand, drawer and niche | 450 × 400 × 450 | legs 150 | drawer at the top, open niche below |
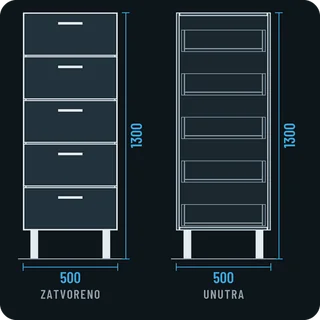 |
Tall chest, 5 drawers | 500 × 450 × 1150 | legs 150 | five drawers |
Hallway (5)
| Thumbnail | Name | W × D × H | Mounting | What it has |
|---|---|---|---|---|
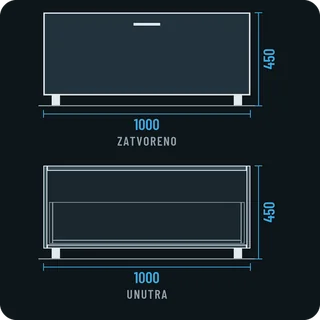 |
Bench with drawer | 1000 × 400 × 400 | legs 50 | one drawer, 25 mm top; seat at 450 mm |
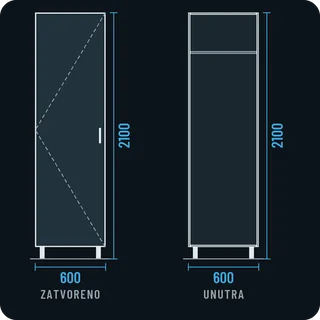 |
Hall wardrobe | 600 × 400 × 2000 | legs 100 | door, shelf, pull-out rail running front to back |
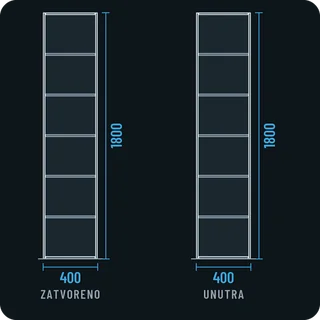 |
Narrow open shelf | 400 × 300 × 1800 | on the floor | open, five shelves |
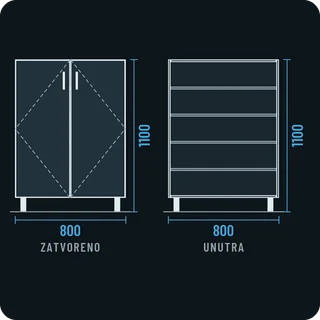 |
Shoe cabinet | 800 × 350 × 1000 | legs 100 | two doors, four shelves |
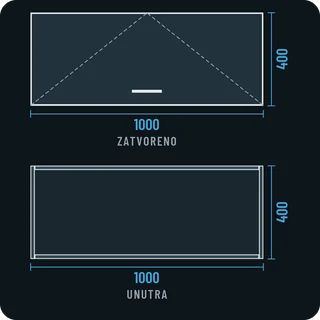 |
Wall unit with flap | 1000 × 350 × 400 | wall-hung, bottom at 1500 | flap hinged at the top |
Office (5)
| Thumbnail | Name | W × D × H | Mounting | What it has |
|---|---|---|---|---|
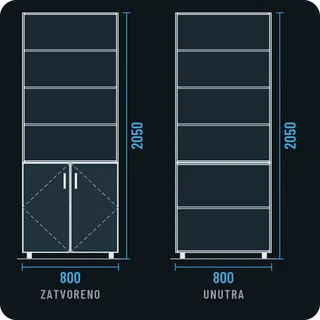 |
Bookcase with lower doors | 800 × 350 × 2000 | legs 50 | at the bottom a 750 mm carcass with two doors and a shelf, at the top an open 1250 mm carcass with three shelves |
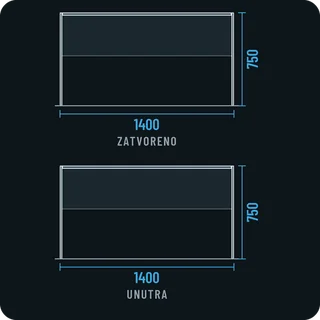 |
Desk | 1400 × 700 × 750 | on the floor | 25 mm top, side panels down to the floor, the back as a 350 mm high modesty panel |
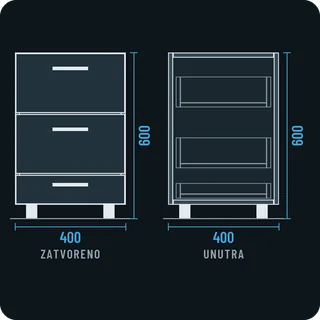 |
Drawer pedestal | 400 × 550 × 550 | legs 50 | three drawers; fits under a 750 mm desk |
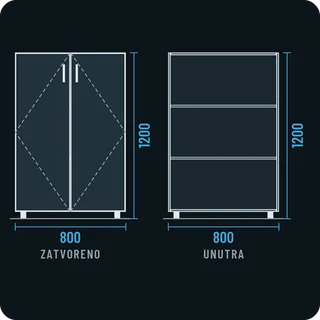 |
Filing cabinet | 800 × 400 × 1150 | legs 50 | two doors, two shelves |
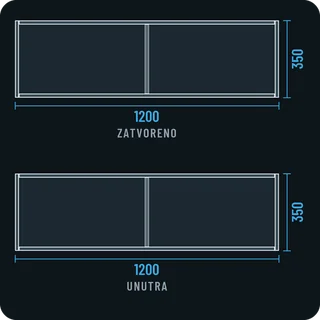 |
Shelf above desk | 1200 × 250 × 350 | wall-hung, bottom at 1100 | open, divider in the middle; 350 mm above the desk |
Common problems and solutions
The template went into the corner or to the end of the run, not next to the cabinet I wanted. That cabinet wasn't selected, or the worktop or another free board was active. Click a board of the cabinet the template should go next to and click the card again. Also check that Forward alignment is chosen in Positioning options.
The template went to the left instead of the right. The space to the right of the selected cabinet was taken. Move it with 1 or select the cabinet at the other end of the run.
The template follows the mouse. You are looking from direction 090° or 180°, or sliding is chosen in Positioning options. Click where you want it, or turn the view so that the header reads 000°.
The template went behind the back wall, outside the room. You were looking from direction 270°, and the scene had no cabinet of the same kind yet. Move it with 2, or place the first cabinet from direction 000°.
The wall unit went beside the base unit, not above it. Next to a selected cabinet a template goes to the side, at its own height. For the wall run, select a wall unit or nothing (then the first wall unit goes into the corner above the base units).
The corner cabinet didn't go next to the selected one. Corner templates and corner cabinets don't take part in placing next to the selected cabinet. Place the corner cabinet, then move it with 1 and 2.
The worktop isn't in the template. It wasn't selected when you saved. Delete the template, select the worktop, Shift-click the cabinet and save again.
The template has a worktop that is too long, or a board from the other end of the kitchen. Every selected free board goes into the template, whole. Before saving, select only the cabinet and the boards that belong to it.
The template holds only part of the cabinet (e.g. only the drawer below the oven). A related carcass was selected. Select the main carcass, the one whose name has no number in brackets.
The fronts of my template have different edge tape than when I saved it. The edge tape of fronts, drawers and cross boards doesn't go into the template: when placed they get the edge tape from My settings or the default. Change it on the placed cabinet.
The Save as template button is grey. No cabinet is selected, or you are not in Object Mode. Click a board of the cabinet.
The Export cabinet button is grey. A board is active, not the cabinet itself. Click the cabinet's name in Cabinet elements.
The new templates don't have the same decor as the rest of the kitchen. A template doesn't carry a decor. In Material assignment, choose the material for the groups again (e.g. Select material for Front 1).
I can't see my template, or the category is empty. Text was left in the search field. Delete it and press Enter. Also check whether you saved it in another category.
Two of my templates have the same name. You saved twice under the same name. Delete the older one or rename one of them.
My templates are not on the other computer. My templates are on the computer, not in the project. Copy them as in Moving to another computer.
The template didn't appear, and an error is reported. The message ends with (details in the EFS log, Easy Form Studio panel). Send the log to support (see Support).
Shortcuts in this chapter
| Key | Action |
|---|---|
| N | Opens and closes the sidebar |
| Enter | Confirms the search and the name in the dialog |
| Shift + click | Adds an object to the selection (worktop and cabinet) |
| Shift+A | Blender's Add menu; in it Easy Form Studio with the templates |
| Esc | Cancels moving the template with the mouse |
| Ctrl+Z | Undoes placing the template |
| R | Turns the selected cabinet by 90° |
| 1 / 2 / 3 | Move along the X, Y or Z axis |
| F / D / L | Next front, drawer layout, legs |
| X | Deletes the selected cabinet, and with it the carcasses related to it |
| C | New cabinet (unlike a template, it starts from My settings) |
Next
Next chapter: Working faster